E-Rx User Interface Refresh: What’s New in the Enhanced Experience [Coming Soon]
Note: the legacy DoseSpot user interface (UI) will be replaced by the enhanced DoseSpot UI for all users starting in 2026. Healthie will notify you ahead of your migration to the enhanced UI so you're prepared every step of the way.
Healthie has updated its DoseSpot integration to give providers access to DoseSpot’s enhanced E-Rx interface. The new user interface (UI) introduces meaningful workflow improvements including batch prescribing, draft prescriptions and a Smart Sig Builder. Here is an overview of E-Rx and Healthie.
Below is an overview of what’s changed, what’s new, and how both providers and proxies can navigate the updated UI.
In this article:
Migrating to the Enhanced UI
The DoseSpot UI refresh includes a modernized interface with a cleaner layout, faster load times, and improved performance across devices. There is no action needed on your part to access the enhanced UI and Healthie will clearly communicate a transition date.
Migrating to the enhanced interface ensures your practice continues to benefit from ongoing improvements and platform support. Your existing prescription history, provider permissions, and organization settings are all preserved in the transition.

|

|
Batch Prescribing
Providers can now add multiple prescriptions for a single patient in one session and submit them all at once, rather than sending each prescription individually.
What’s improved:
- Add multiple medications to a patient’s prescription queue before submitting
- Review all pending prescriptions in a single view before sending
- Submit the full batch with a single approval action
Why this matters: For patients managing multiple conditions or medications, batch prescribing significantly reduces the time spent on each prescribing session and lowers the risk of omitting a medication mid-workflow.
To create a batch prescription in DoseSpot:
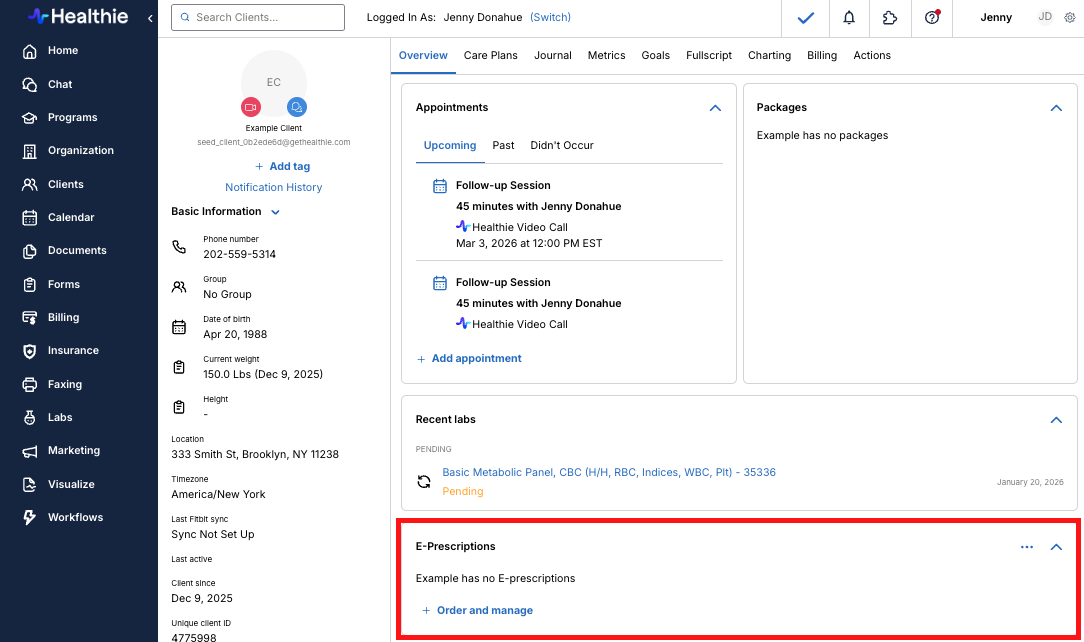
- Navigate to Clients > Client Profile Overview > E-Prescriptions > Order and Manage
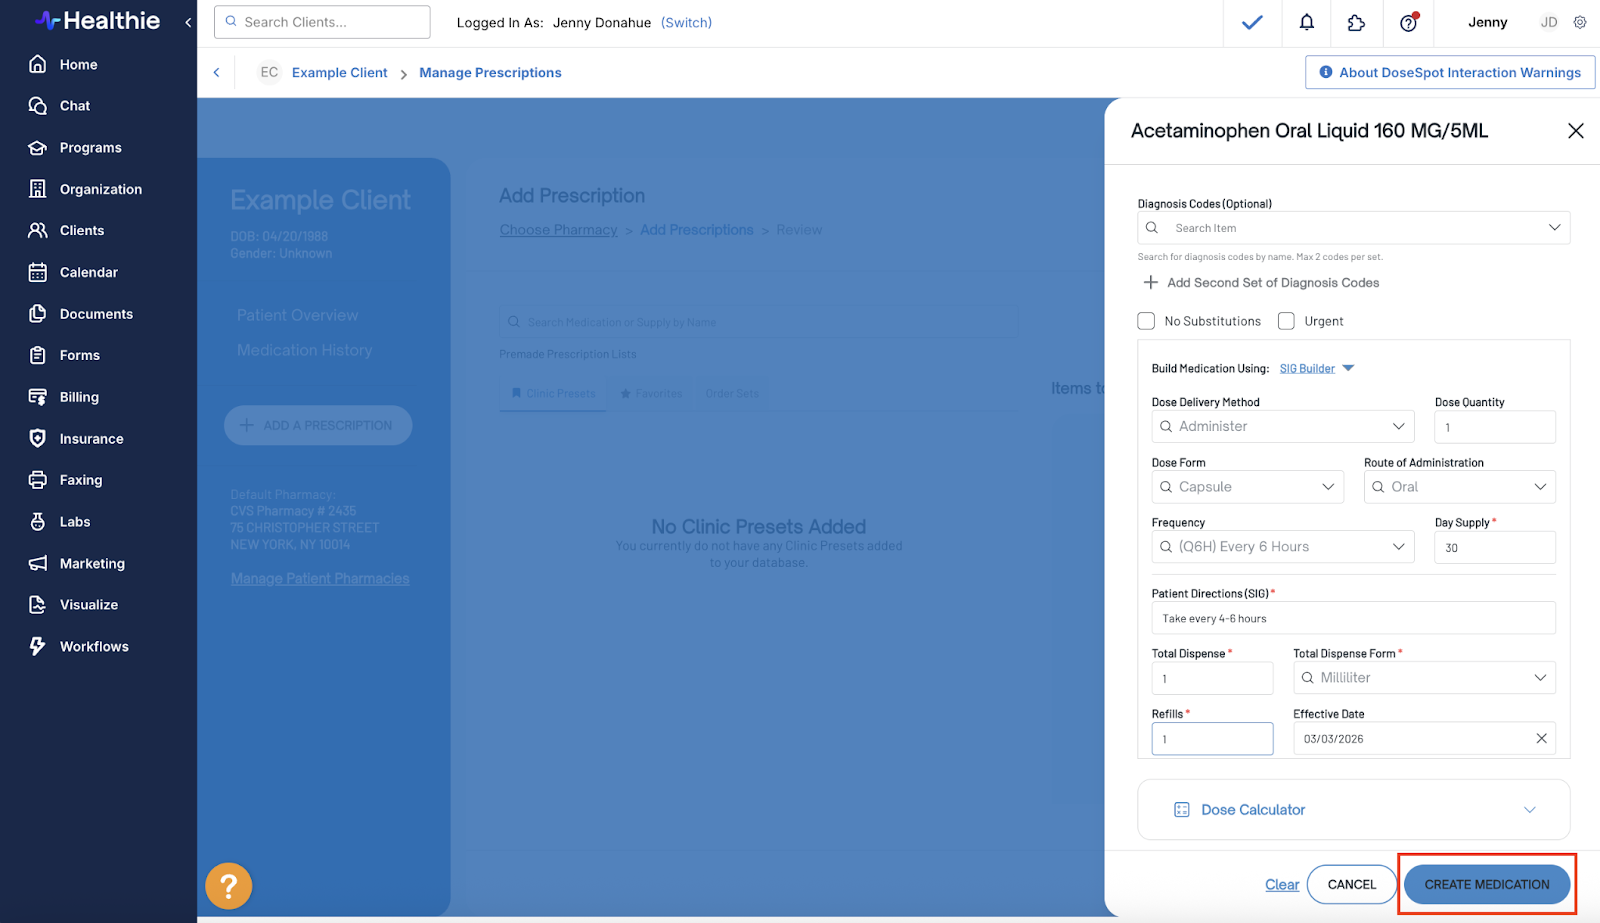
- Click Add Prescription > complete medication details > Create Medication
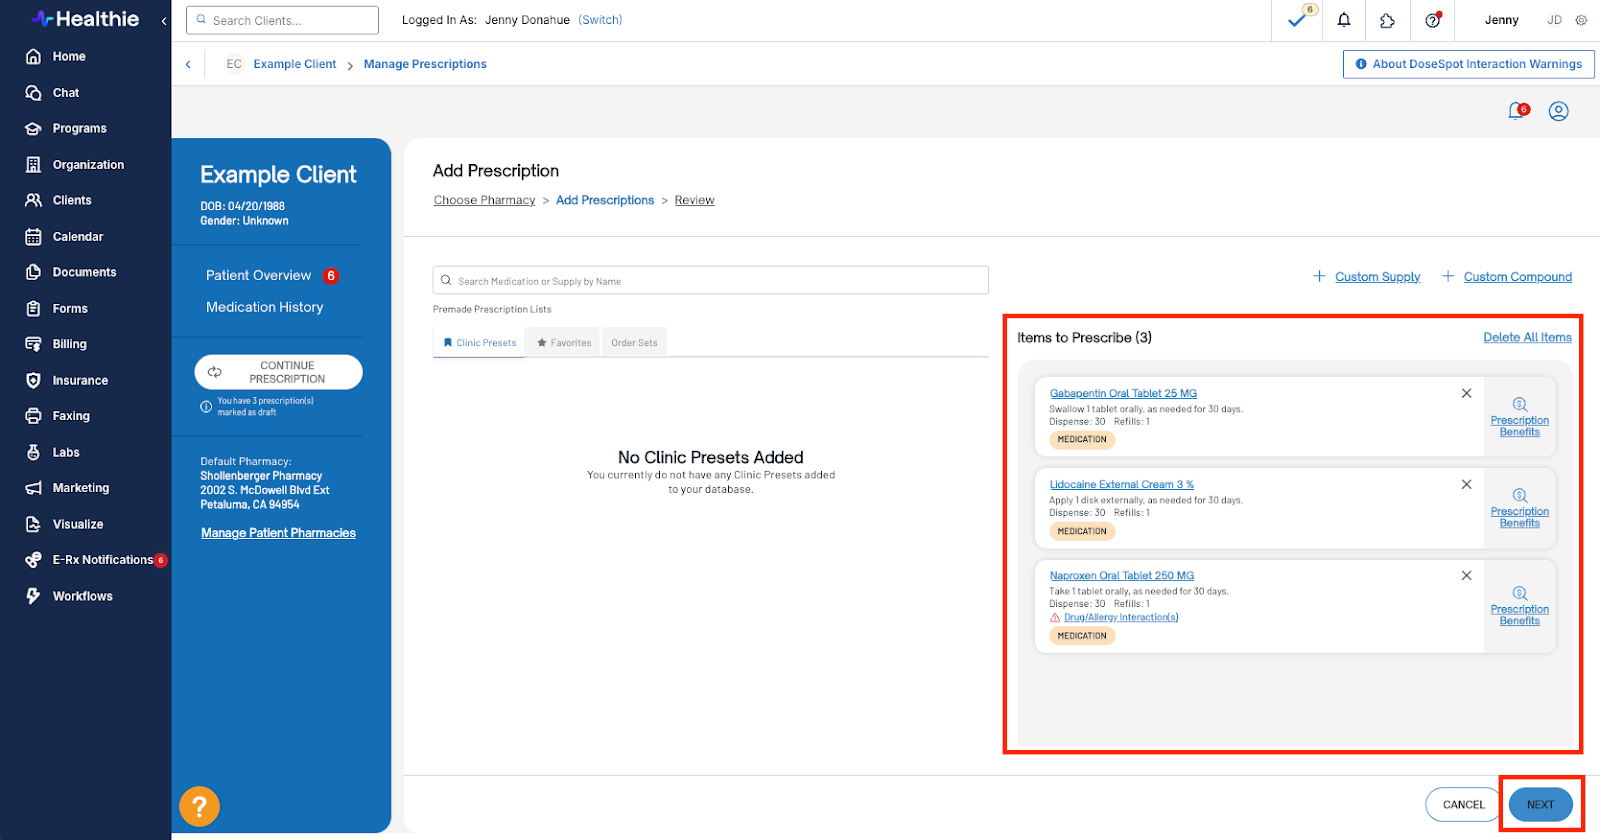
- Search for any additional medications and repeat the step above until all desired medications have been added to Items to Prescribe > Next
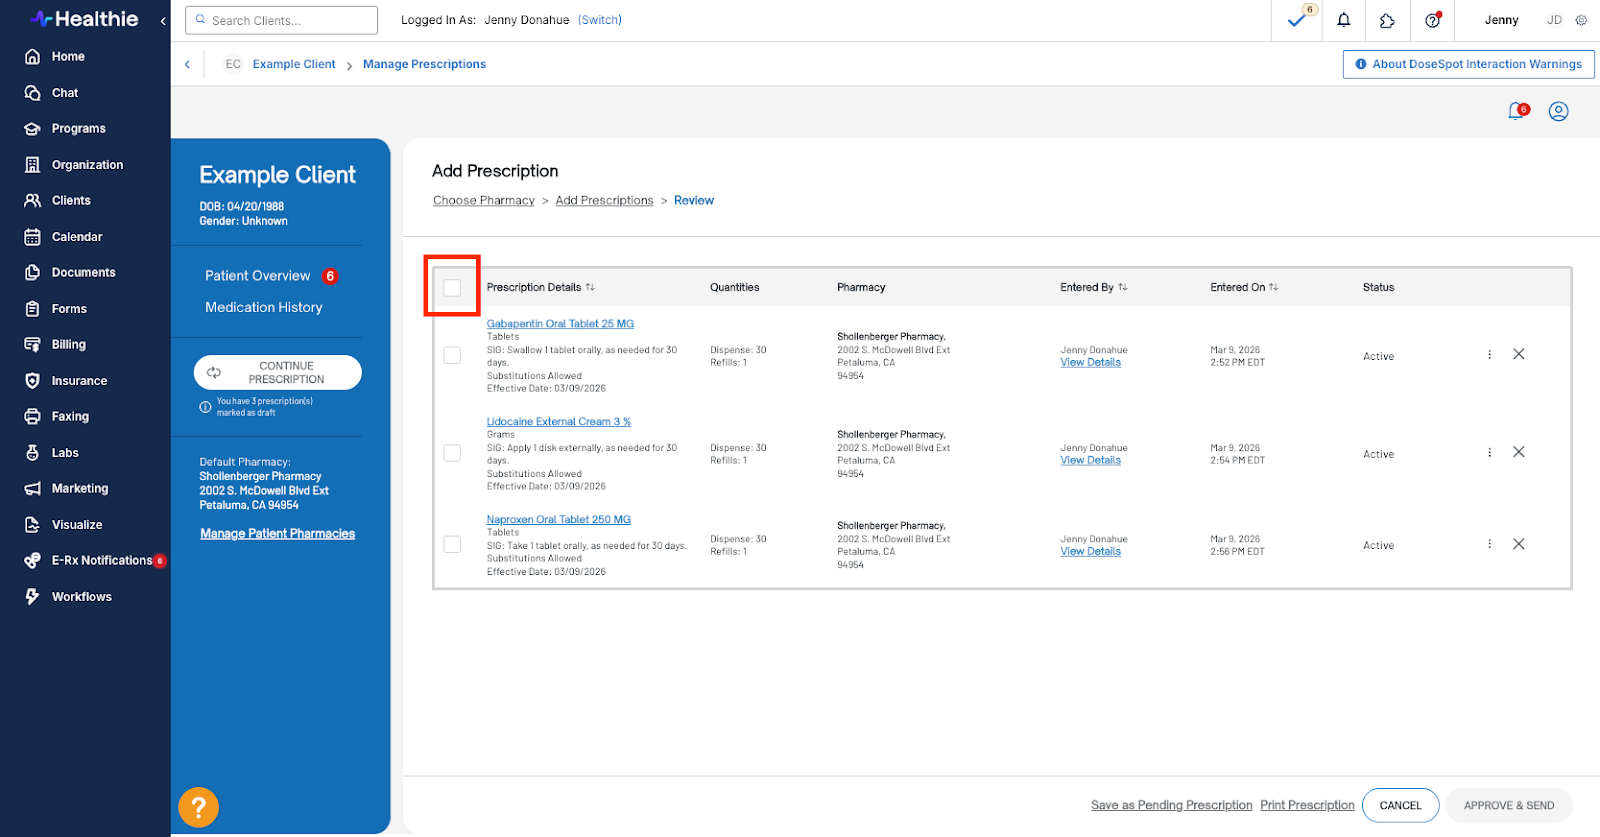
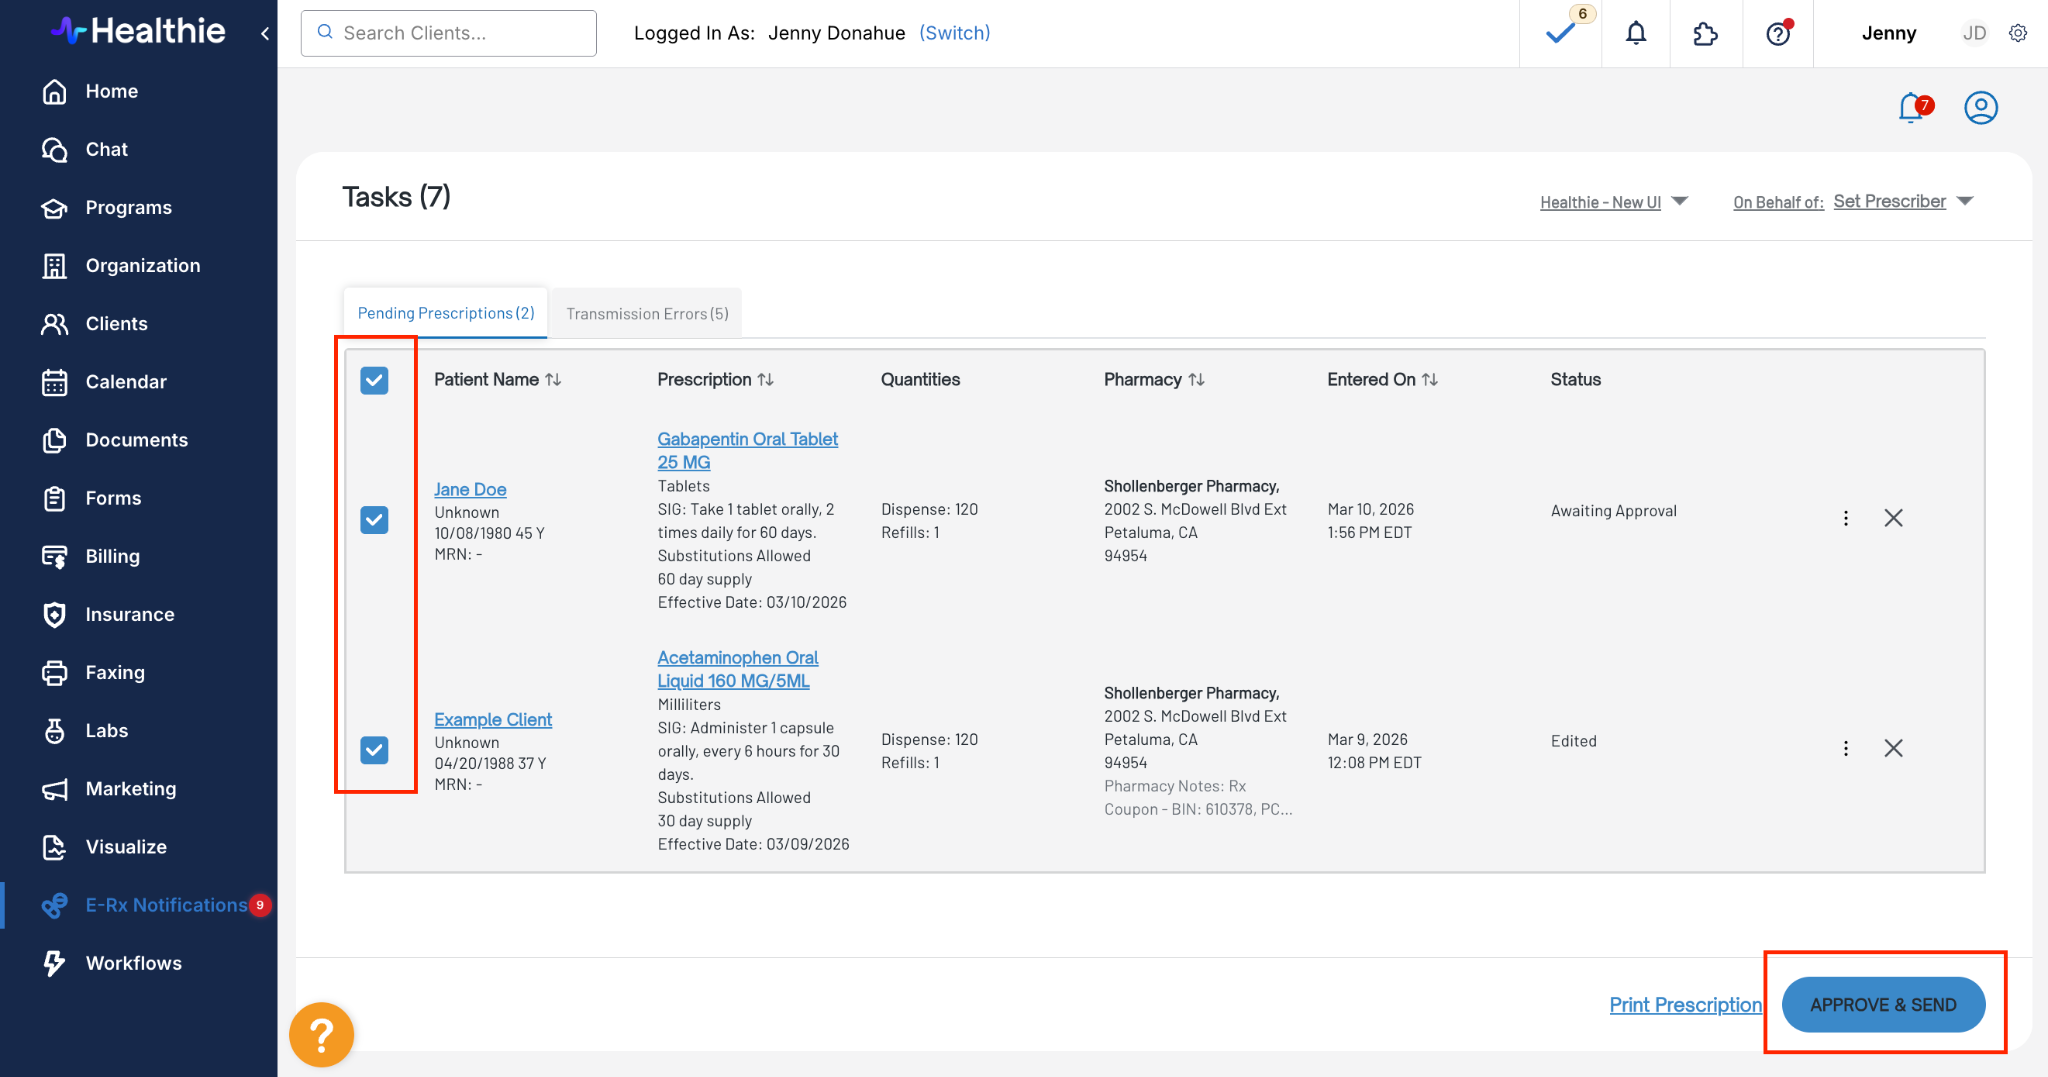
- Check the box in the top left to select all medications
- Click Approve & Send > Enter Pin Number > Send
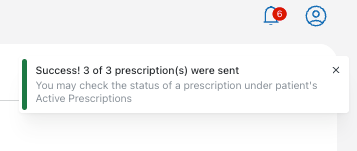
You will see a banner to confirm successful submission and the medications will be listed under the client’s active prescriptions.
Adding and Saving Draft Prescriptions
Prescriptions can now be saved as drafts and returned to later, without losing any of the information already entered. A draft is automatically saved once
What’s improved:
- Save a prescription in progress without submitting it
- Return to drafts at any time to review, edit, or complete them
- Drafts are preserved across sessions so no work is lost
Why this matters: Providers who need to confirm details before sending—or who are interrupted mid-workflow—can now save their progress rather than starting over. This reduces errors and supports more deliberate prescribing.
Here's how adding and saving a draft prescription works:
- Click Add Prescription within DoseSpot > complete the medication details > Create Medication
- After this step, your medication is saved as a draft prescription. If you navigate out of the prescription flow, you can click Continue Prescription at any point to pick-up where you left off
- Once all medications are in the Items to Prescribe section, click Next
- Select the medications by checking the appropriate boxes > click Approve & Send
- In the Actions Before Sending Modal, enter your Pin Number and click Send
Note: due to the draft state, there is one additional click to approve & send a prescription relative to the legacy experience.


Multi-Client Approval
Providers can now review and send pending prescriptions across multiple clients in a single approval workflow, rather than navigating to each client’s chart individually.
What’s improved:
- A consolidated pending prescriptions queue across all clients
- Review and approve multiple client prescriptions from one screen
- Reduces time spent navigating between individual charts
Why this matters: For high-volume prescribers or practices with end-of-day approval workflows, multi-client approval dramatically reduces the administrative time spent routing through individual charts to clear a prescription queue.
Here’s how to approve and send medications for multiple clients :
- Through each Client’s Healthie Profile Overview > E-Prescriptions > Order and Manage
- Add the desired medications and save them as drafts so they appear in Pending Prescriptions for each client
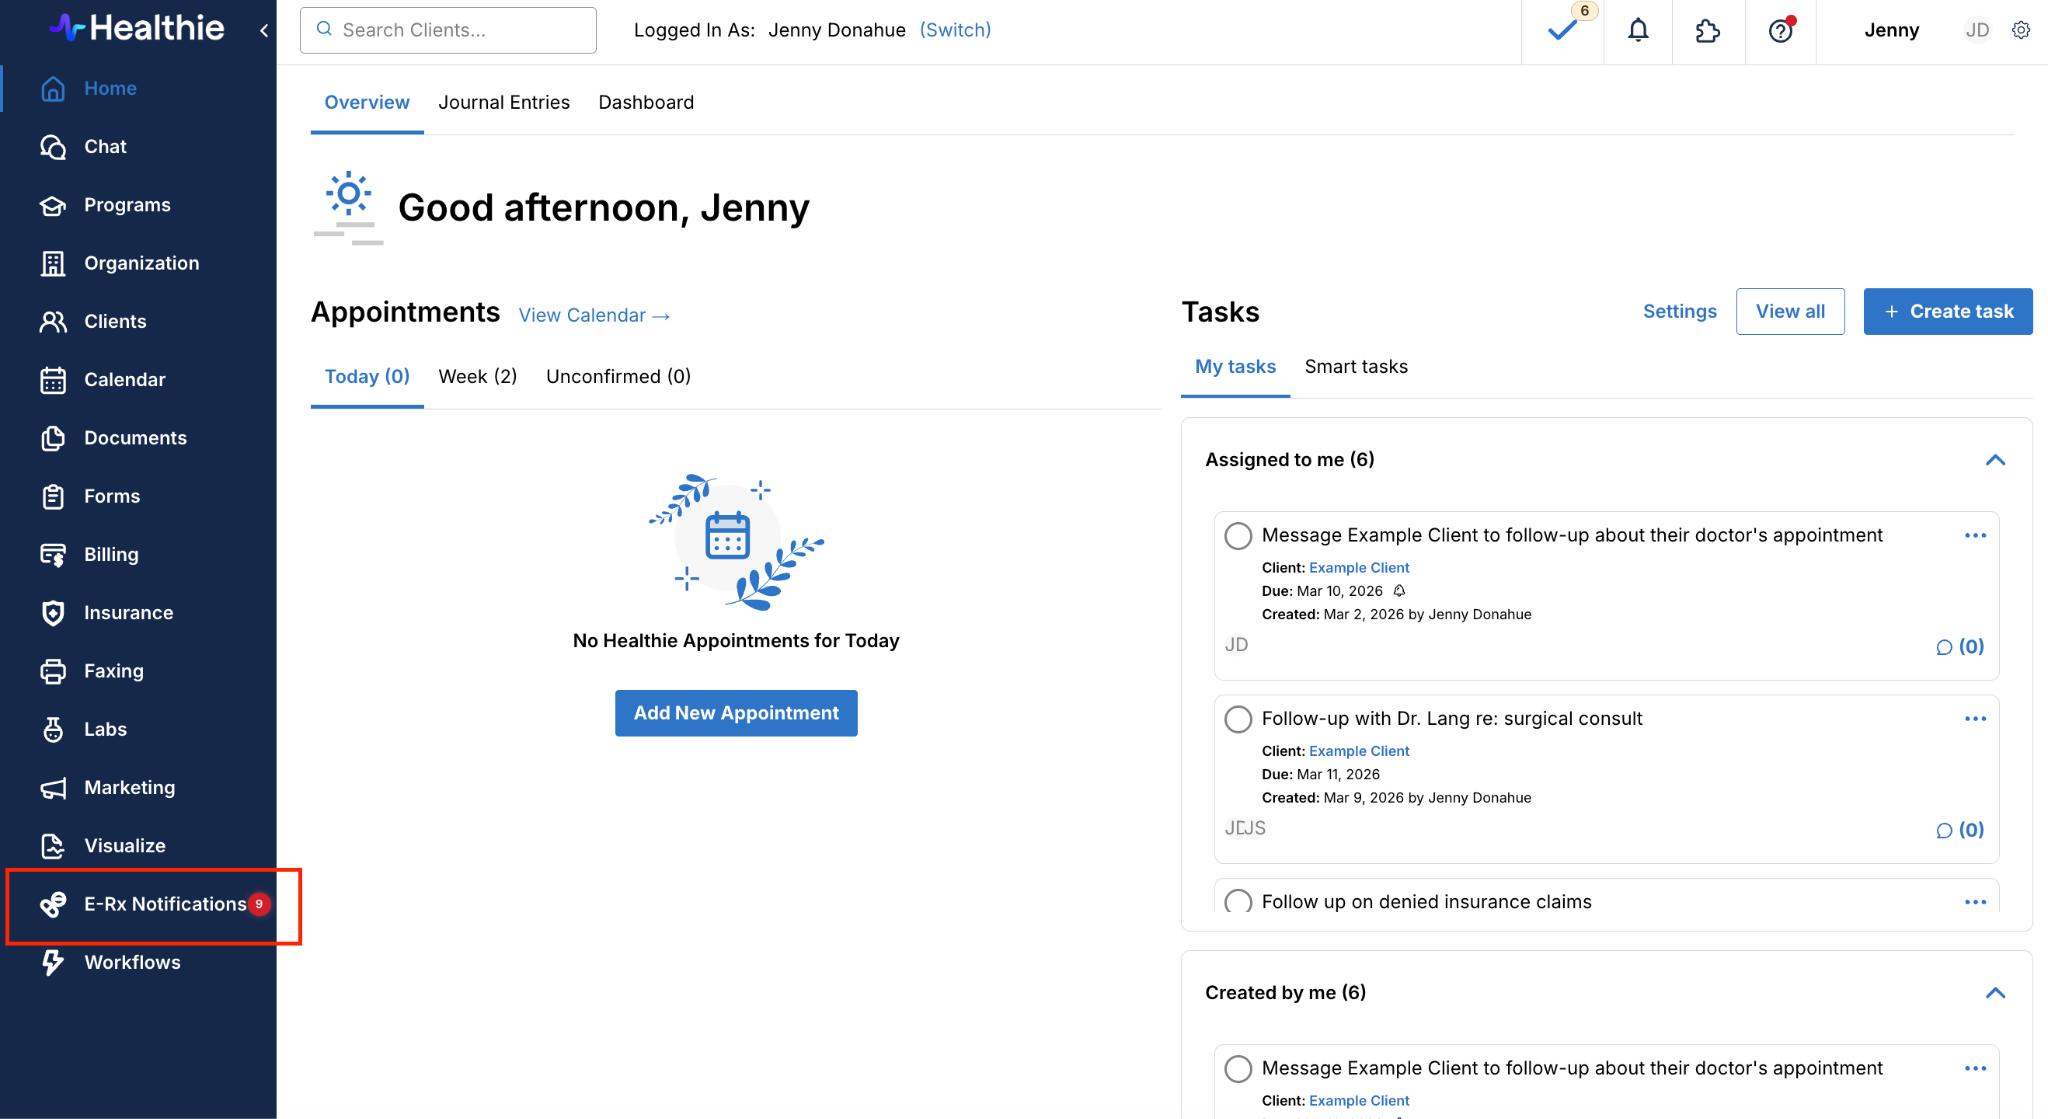
- Navigate back to Healthie and click on the E-Rx Notifications tab
- Select the medications for multiple clients by checking the boxes > Approve & Send
Smart SIG Builder
The Smart SIG Builder automatically generates patient-facing directions and calculates the total dispense amount based on the dosing information the provider enters.
What’s improved:
- Enter dosing information once; directions are generated automatically
- Total dispense quantities are calculated based on your inputs
- Patient-facing language is clear, consistent, and standardized
- Reduces manual entry and the risk of direction errors
Why this matters: Manual SIG entry is one of the most error-prone steps in e-prescribing. The Smart SIG Builder reduces transcription risk while also saving time—particularly for complex dosing regimens.
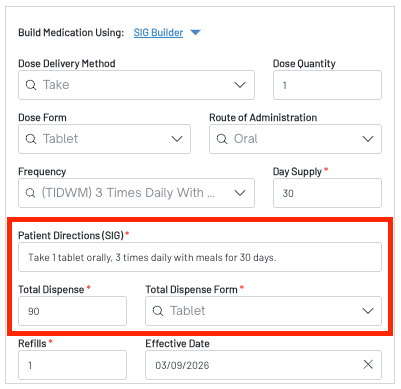
How to use the SIG Builder:
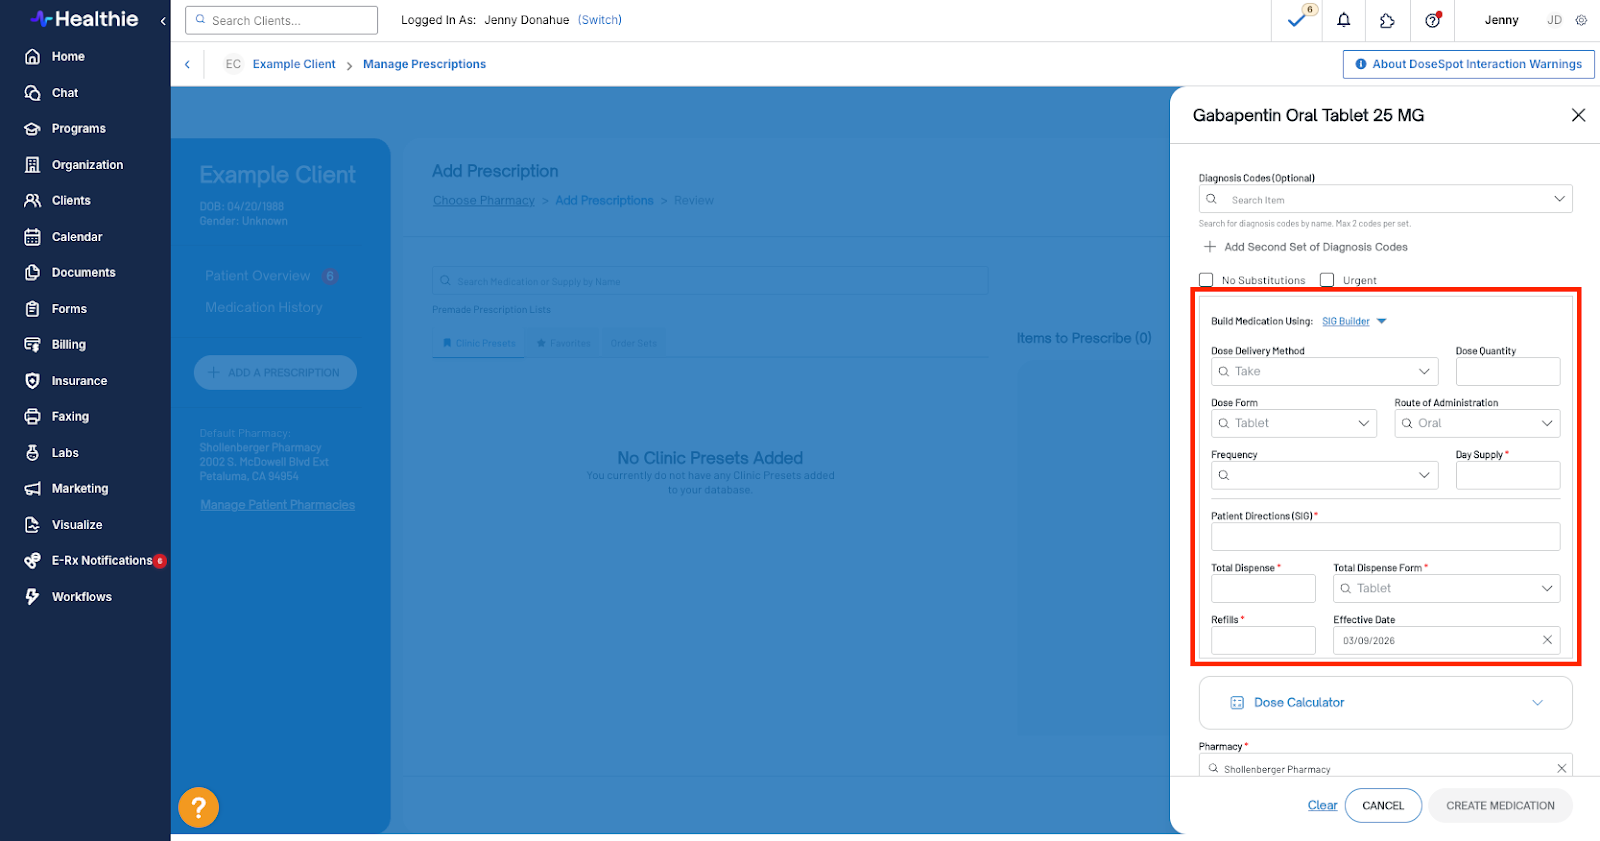
- Once you’ve selected a medication from the search bar or Favorites, complete the following fields:
- Dose Delivery Method
- Dose Quantity
- Dose Form
- Route of Administration
- Frequency
- Day Supply
- The Patient Directions (SIG), Total Dispense and Total Dispense Form fields will auto-populate based on the above
Order Sets
Providers can now save commonly prescribed medication combinations as named Order Sets and reuse them for quick ordering across patients.
What’s improved
- Save any combination of medications as a reusable order set
- Access saved order sets from any patient’s prescribing workflow
- Speeds up prescribing for high-frequency medication combinations
Why this matters: Providers who frequently prescribe the same combinations—such as a standard protocol for a chronic condition—can reduce repetitive data entry and keep prescribing workflows fast and consistent.
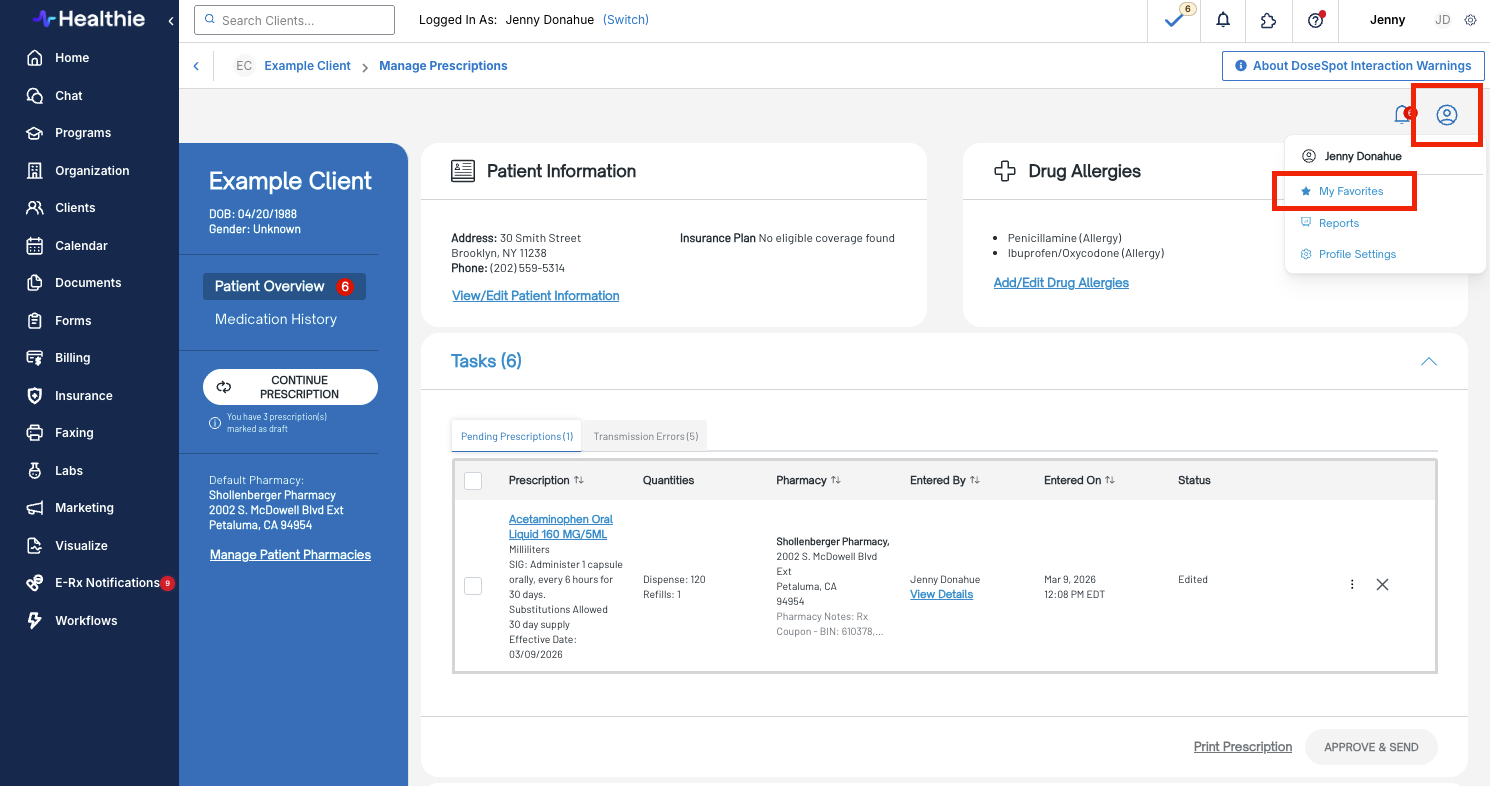
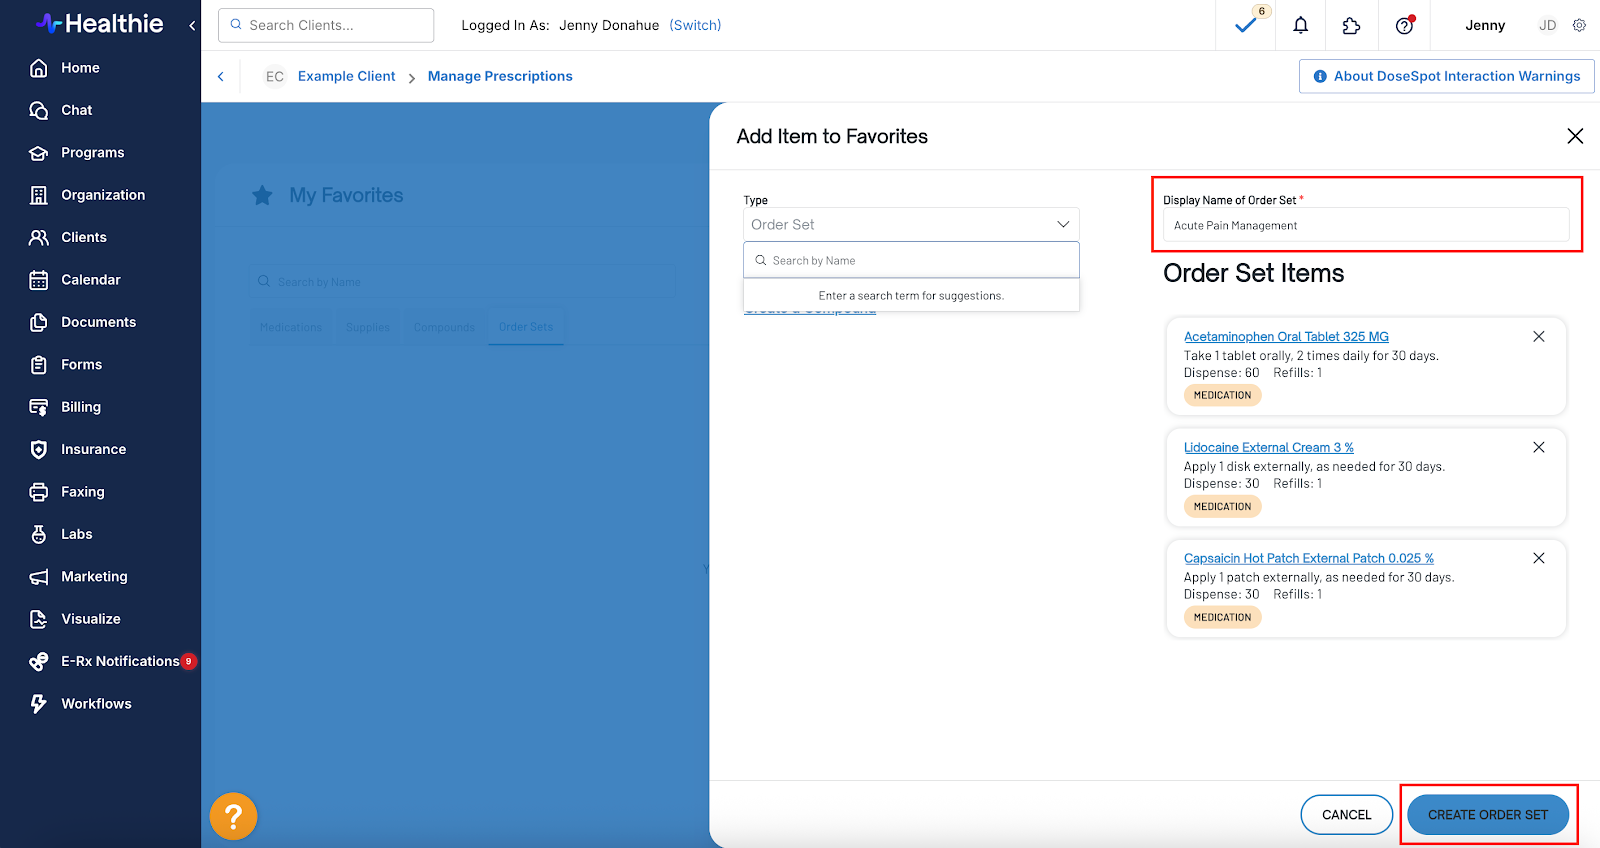
How to create an order set:
- Within a client’s DoseSpot profile, click on the profile icon in the top right > Favorites
- Click on the Order Sets tab and click + Add New
- Name your Order Set and add the items to include
- Click Create Order Set

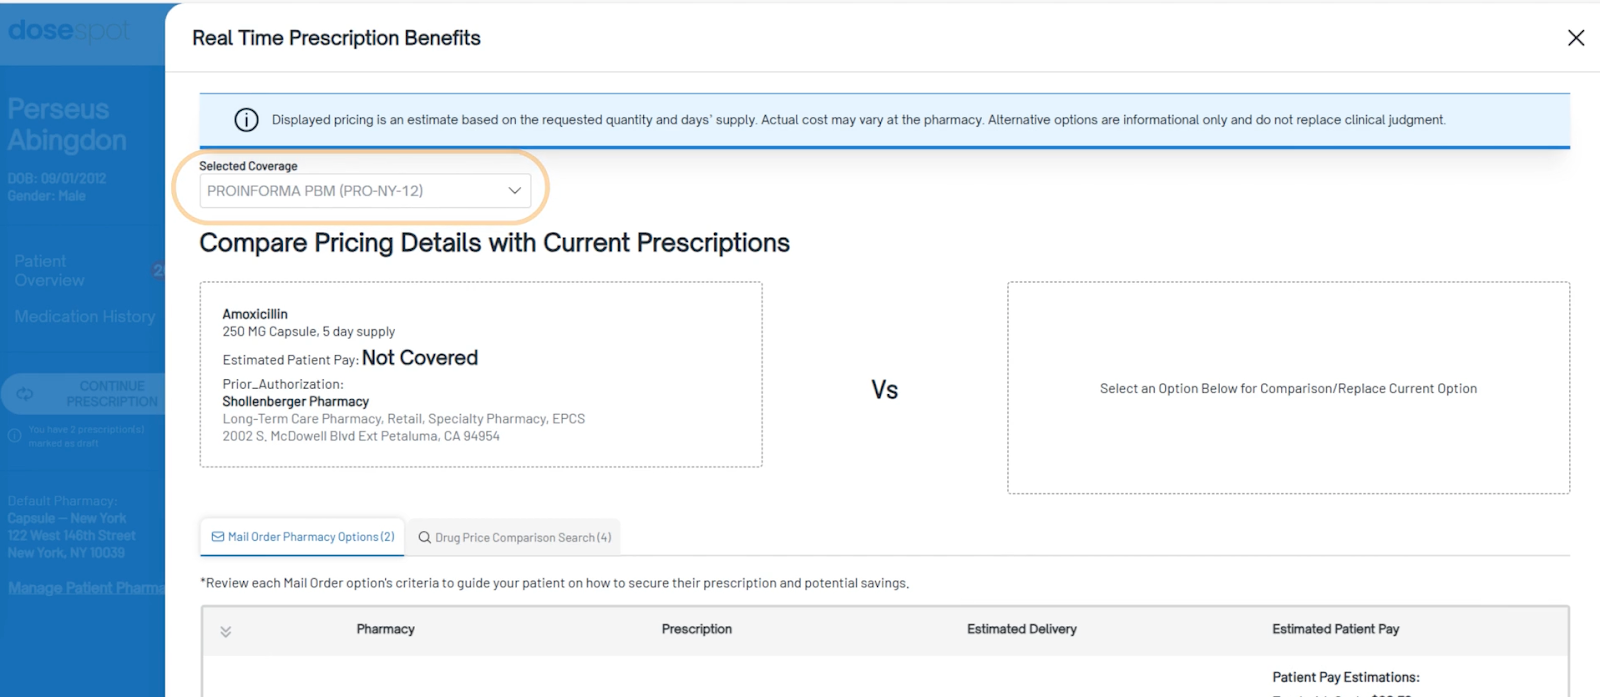
Real-Time Prescription Benefits
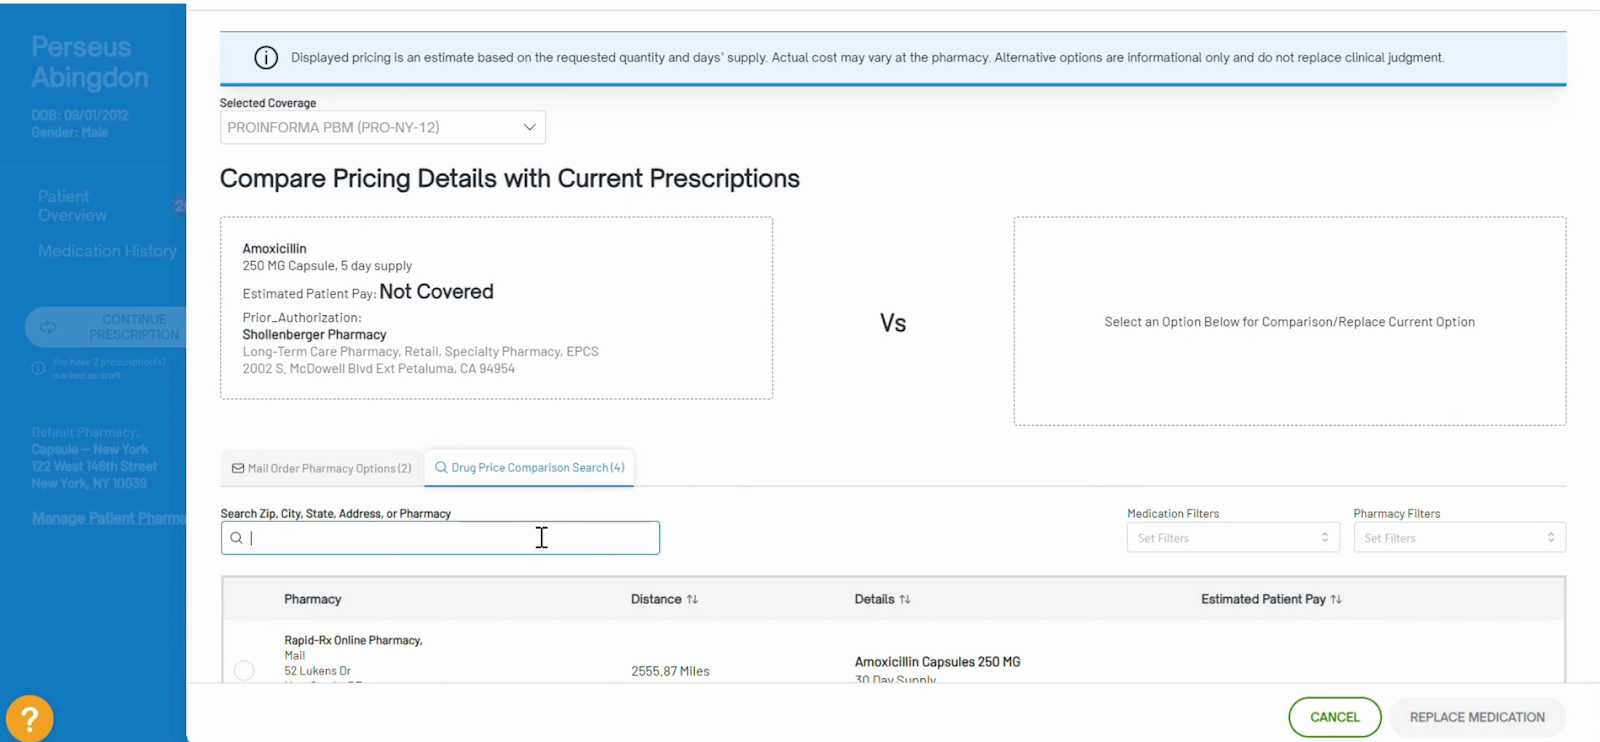
DoseSpot now provides Real-Time Prescription Benefits to enable users to compare pricing for medications based on pharmacy and medication type to meet their client’s needs.
To access Real-Time Prescription Benefits:
- Navigate to Clients > Client Overview > E-Prescriptions > Order + Manage
- Select + Add a Prescription button
- After adding a medication to the Items to Prescribe section, you can view the benefits for each medication by clicking View Prescription Benefits
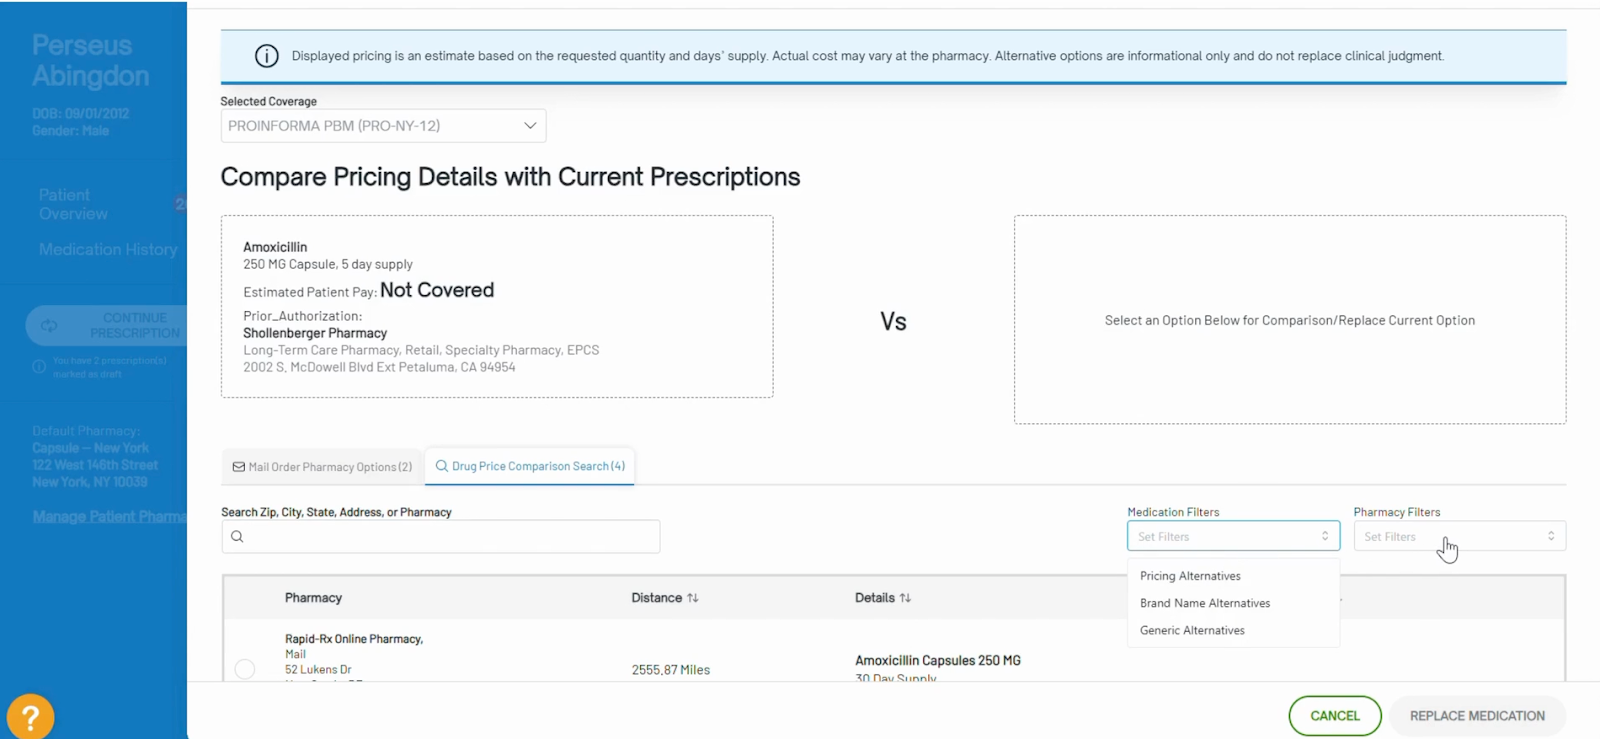
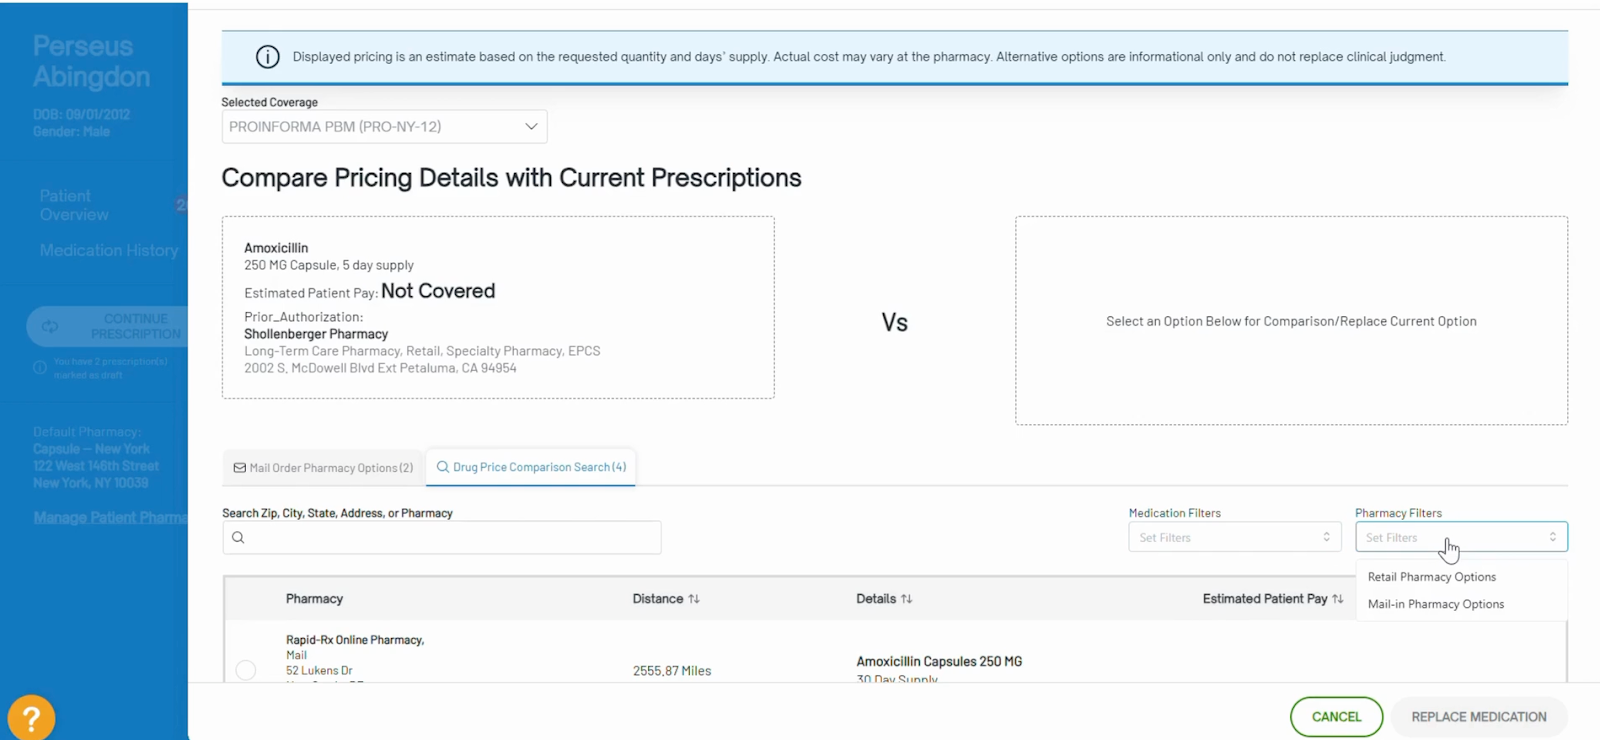
- From here, you can compare pricing details for the current medication by zip code, city, state, address or pharmacy. You can also use medication and pharmacy filters to narrow down your results.
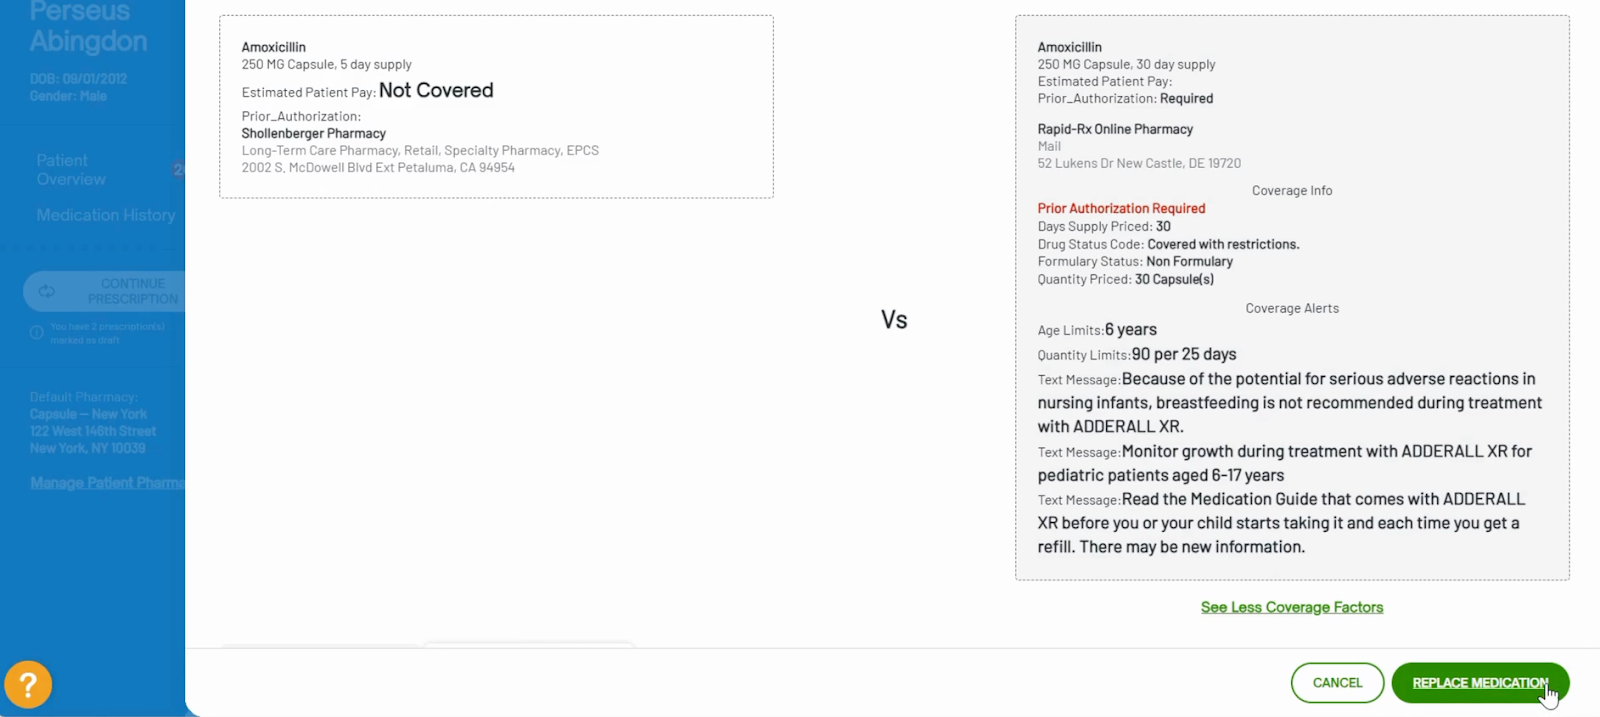
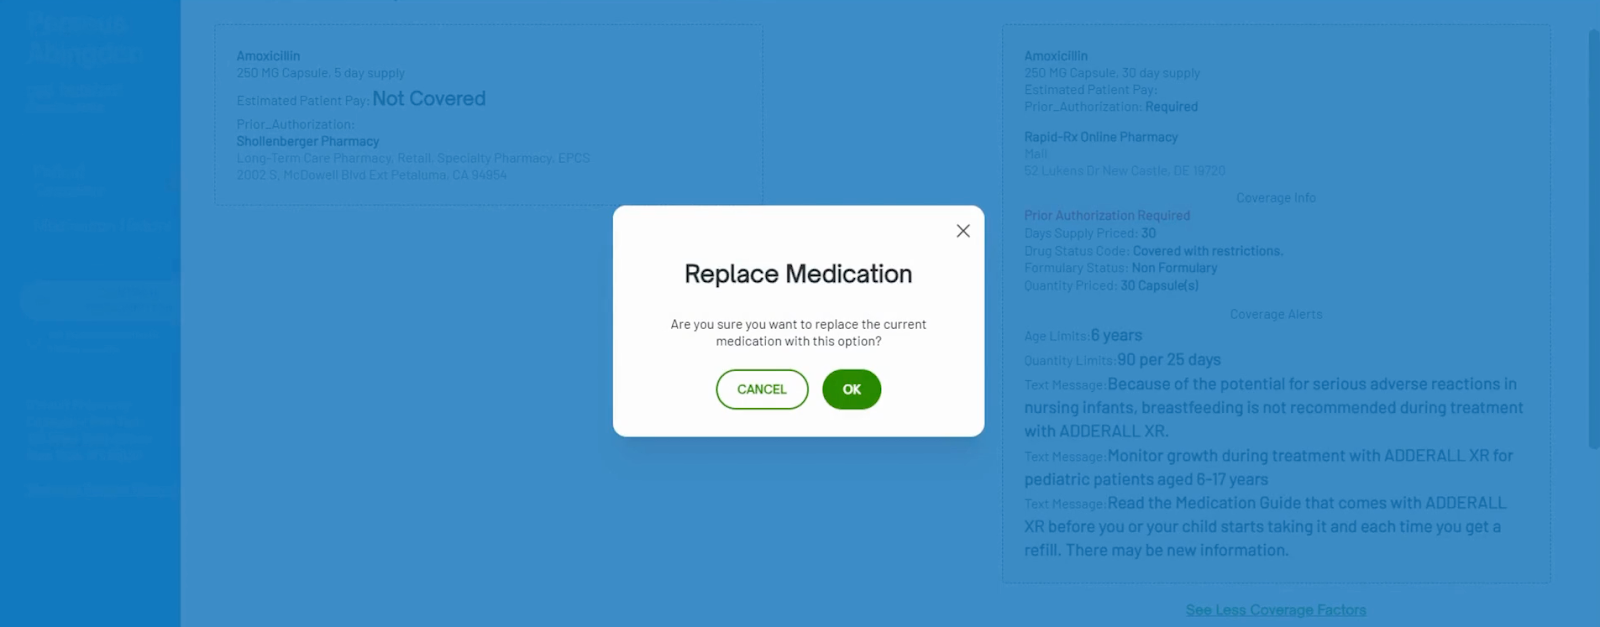
- If you select a potential replacement from the list, a side-by-side comparison will display and you can click See Full Coverage Factors for a more detailed comparison.
- Click Replace Medication to swap > confirm with OK
- Provide new prescription details > Create Medication
Learn more in DoseSpot’s Real-Time Prescription Benefit guide.

Reporting Access Now under Profile Icon
To create a cleaner Patient Overview, reporting access can now be found by clicking on the profile icon in the top right.


What Stays the Same
This update modernizes the DoseSpot interface accessed through Healthie, but does not change your core e-prescribing data or workflows:
- Full prescription history is preserved and accessible in the new UI
- Provider DEA numbers, NPI, and credentials are unchanged
- Org member permissions and proxy/provider relationships carry over
- The DoseSpot integration is still accessed the same way within Healthie
- No changes to how prescriptions are routed to pharmacies
DoseSpot also has this resource page available, which gives a video walkthrough of their new enhanced experience.