Getting Started: Client Groups
Healthie enables you to create client groups in order to organize your clients and to tailor their experience. This article covers how to create and manage client groups within your account.
IN THIS ARTICLE:
- Overview: Client Groups
- Creating a new client group
- Associating a group with an intake flow
- How to manually add a client to a group
- How to automatically add a client to a group
- Change a client's group
- Delete a client group
- Best practices: managing clients with groups
- Share a document automatically with a group
Overview: Client Groups
Creating client groups is similar to creating a "list" in an email platform. It's a powerful way to organize your clients, and to trigger specific workflows. Clients can only ever be added to one client group at a time.
Here's a few ways that providers use client groups within Healthie:
- Distributing particular intake forms to different groups of clients (e.g., you may want your weight loss clients to fill out different forms than pediatric clients)
- Automatically placing clients into group conversations, or sending message blasts to a group
- Automatically sharing documents, folders, or education courses
- Enabling visibility/access for certain client packages
- Reporting purposes: Reports in Healthie show the Group that a client is enrolled in Learn more
Creating a new client group
The first step in managing your groups is to start creating groups. Some wellness providers create groups based on the stage of the client (ie. prospect, new client, follow-up client), by population type (ie. adults, pediatrics), by disease state (ie. diabetics, eating disorder), or by services (3-month package, webinar, programs).
To add a new group:
- Navigate to the Clients tab of your Provider dashboard
- Click the "Clients Tab" in the menu
- Click the blue "Add Group" button
You'll be asked to give your group a name, and you can always update the name in the future.

Associating a group with an intake flow
You may want different groups to receive different forms/paperwork, or even no paperwork. Once you've created your group you can change the " Intake Flow" from the Client Groups page.
- Click the "Actions" button (the three dots) next to the group
- Select "Change Intake Flow"
- From the dropdown, choose the intake flow you'd like to associate
- Hit "Save Changes"

How to manually add a client to a group
When you add a new client to Healthie, you'll be able to sort them automatically into a group. Note that a client cannot belong to more than one group.
- Navigate to Clients > Add client
- Select the group from from the Client Group drop-down
- Click Add and invite client

How to automatically add a client to a group
Clients can also be automatically added to a group when they purchase a package or book an appointment if you choose. This is not a requirement -- you can leave the group fields blank or select "do not change client's group" so that you can maintain manual control over group assignment.
Keep in mind, when a client purchases a package or books an appointment associated with a different group, they will be moved out of their current group and into the new one, and they will be prompted to complete any new paperwork that is associated with their new group (if there is any). Clients cannot be in multiple groups at once.
1) Associating an appointment type with a client group
To associate a client with a group based on an appointment type:
- Navigate to the Gear Icon on the top-right of your Provider dashboard (next to your image)
- Click "Settings"
- From the left menu, go to Calendar > More > Appointment Types
- Click the Actions (3 dots) tab next to the appointment type you'd like to modify > EDIT
- From the drop-down, select the group you'd like to change
To not move clients into a group after booking an appointment, select "Do not change client's group" from the drop-down.

2) Associating a client package with a client group
For every client package you create, you can select a client group to be associated with it, or leave the field blank to prevent clients from changing groups.
- Select "Billing" from your Provider dashboard
- Click "Client Packages"
- Click the arrow next to "View" on your package, and choose "Edit" from the options
- Scroll to the bottom of your package to find the "Group" field, and select the group you prefer
You'll also see two additional settings options that you may enable or disable by checking the box:
- Have all new clients or clients without a client group move into your selected group.
- Have all existing clients move from their current group into your selected group.
Note: if a client moves into a new group, and you have any NEW paperwork/intake flows associated with that group, your client will be prompted to complete those new forms. If they have already completed the forms, they will not be asked again. If you do not want your client to change groups or complete any new paperwork when they purchase a package, uncheck the box on the corresponding settings feature.

Change a client's group
Here are instructions on how to Change a Client's Group
Delete a client group
If you'd like to remove a group permanently, you can:
- Click the "Actions" button (the three dots) next to the group
- Select "Delete"
- From the dropdown, choose the new group that you would like any existing clients in that group to be moved into
- Hit "Delete"

Best practices: Managing clients through groups
- At this time, clients can only be a part of one group. If you have a common overlap between two groups, we recommend creating a third group for this instance. We relatedly have a Client Tags feature, which is helpful to set additional attributes for a client.
- When you add/move a client into a new group, they will automatically receive the forms in your intake flow associated with that particular group. The next time they log in, they will be prompted to complete these forms.
- They will NOT receive an email that you have changed their group, so if you'd like them to receive an email prompting them to complete forms, please use Request Form Completion - you only need to send ONE request form completion email, and they'll see all/multiple forms that are uniquely associated with the group you've moved them to when they log in.
- A client can only be manually removed from a group. Unsubscribing a client from a package or program will not automatically remove them from the group associated with said package or program.
- You cannot recover a deleted group
Share a document automatically with a group
Healthie helps you save time when working with groups by enabling you to automatically share resources from your library with a group.
To share a document with a Client Group automatically:
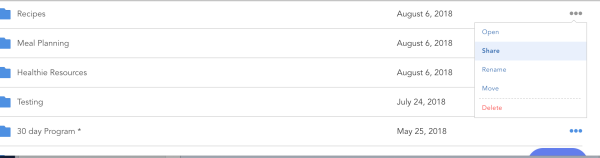
- Documents tab > Actions tab (three dots)
- Select "Share"
- From the option, locate your Client Group
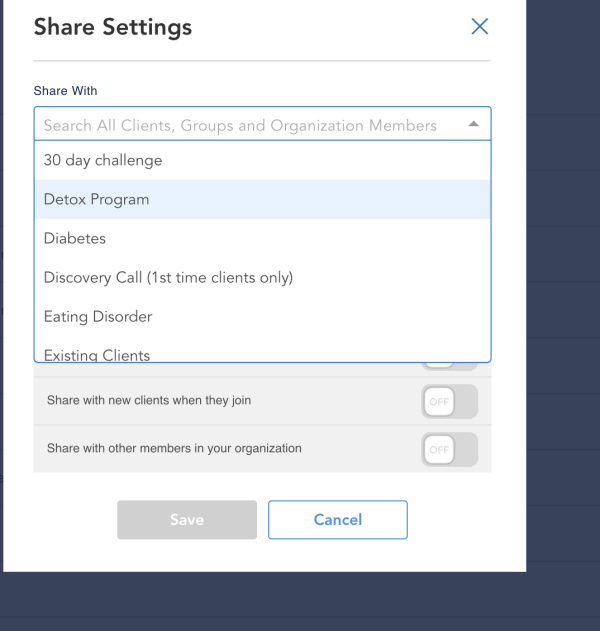
Once you select Share, another pop-up box will appear for you to select an individual name or a group:
Your list of groups will appear at the top. Once you select the group's name, anyone who's in the group or placed into the group, that document will automatically be shared with them.