Client Profile Overview
The Client Profile is your centralized hub for managing client information and actions. It consolidates all stored details and tools you need to deliver personalized care efficiently—all in one place.

In this article:
- What's Included in the Client Profile?
- Manage Client Information in the Actions Tab
- What can Providers do in the Client Profile?
- "Client Info" Section of the Client Profile
- "Client Settings" Section of the Client Profile
- Labs Component of the Client Profile
- Medications Component of the Client Profile
- Client Profile on the Healthie Mobile App
- Customize Client Profile in Healthie
What’s Included in the Client Profile?
Client profile is your go-to place to find information and complete tasks or actions.
- Basic Information: Contact details and demographic data
- Appointment Details: View past and upcoming sessions.
- Financial Information: Payments, invoices, cards on file (last 4 digits will show) and balances.
- Insurance Billing Information: Claims, benefits, and eligibility.
- Medications and Prescriptions: Track and manage client medications.
- Labs: View recent lab orders and results
- Program Enrollments: Monitor programs your client is participating in.
- Documents, Forms, and Notes: Access uploaded files, completed forms, and charting notes.
- Care Plans and Goals: Create and track care plans and set measurable goals.
- Metrics and Journals: Monitor health metrics and review client-submitted journal entries.
Manage Client Information In the Actions Tab
The Actions Tab in the Client Profile is designed to help you quickly view and update key client details—all in one place, without needing to navigate away from the page.
Each section includes:
- A three-dot menu for editing, deleting, or managing existing details.
- In some sections, a direct “Add” button is available for commonly used actions—based on user feedback requesting faster ways to enter new information.
When you select an action, a side panel opens—so you can make updates without losing your place in the client’s profile.
This layout helps reduce clicks, save time, and create a more consistent experience across your workflows.

Available Actions by Section
Allergies & Sensitivities
- Add allergies, food intolerances, sensitivities, or dietary preferences directly from the section view.
- Edit or remove existing entries from the three-dot menu.
- Deleting an entry includes a confirmation step.
Diagnosis
- Add or edit diagnoses from the three-dot menu.
Referring Providers
- Use the menu to add, edit, or remove referring provider information.
Family History & Family Contacts
- Add and edit details through the menu.
- Delete entries using the menu as well.
Insurance
- Add new insurance policies using the “Add” button.
- Upload or view insurance cards.
- Delete policies with a confirmation step via the menu.
Personal Information
- Now organized into three tabs: Personal, Demographic, and Health Information.
- Edit client details from the menu.
- Reset or change a client’s password and resend invites—all from the same section.
Client Addresses
- Add new addresses using the “Add” button.
- Edit or delete existing addresses from the menu.
- View multiple addresses in an updated, more spacious layout.
Appointment Pricing
- Add, edit, or remove pricing by appointment type from the menu.
Implantable Devices
- Manage device names and unique device identifiers (UDIs) using the menu.
What Can Providers Do Within the Client Profile?
The Client Profile not only keeps client information organized but also empowers you to take actionable steps to deliver tailored and effective care.
- View and update client information.
- Manage appointments, billing, and insurance claims.
- Create and edit care plans, goals, and metrics.
- Engage clients through journaling or messaging.
- Access and complete charting notes or review submitted documents.
Here are some other helpful actions you can take within the profile:
- See Client Notifications history
- Find your client unique ID — this ID # is helpful when communicating with Healthie support, and you want to reference a client (without sharing their name or other PHI)
- Ability to reset password for a client
- Ability to resend welcome / invite email to a client
- See when a client first joined Healthie and their last login date
- Document Quick Notes
- See (and complete) tasks associated with a client
"Client Info" Section of Client Profile
Within the Actions tab of the Client Profile, you'll find all personal and demographic information for a Client, including:

- Name, Legal Name, Preferred Name
- Phone number
- Address
- Timezone
- Race
- Ethnicity
- Sexual orientation, Gender, Pronouns
- Date of birth
- Assigned client group
- Assigned Provider (or Care Team members)
- Client Source
Insurance Policies:
- Primary insurance
- Secondary insurance
- Mental health carve-out
- Inactive insurance
Family & Contacts:
- Add contacts (designate emergency contacts)
- Link client accounts
Diagnoses
Allergies & Sensitivities
- Allergies
- Food sensitivities & intolerances
- Food preferences
Family History
"Client Settings" Section of Client Profile
Healthie is designed to allow clients and providers to work together, and for clients to easily share data about their health, food intake, lifestyle, and more. Providers are able to customize the settings for a client account, including the option to disable settings that are not relevant to the client's care (or to the provider's care approach and specialty).
Learn more about configuring settings for a client here.

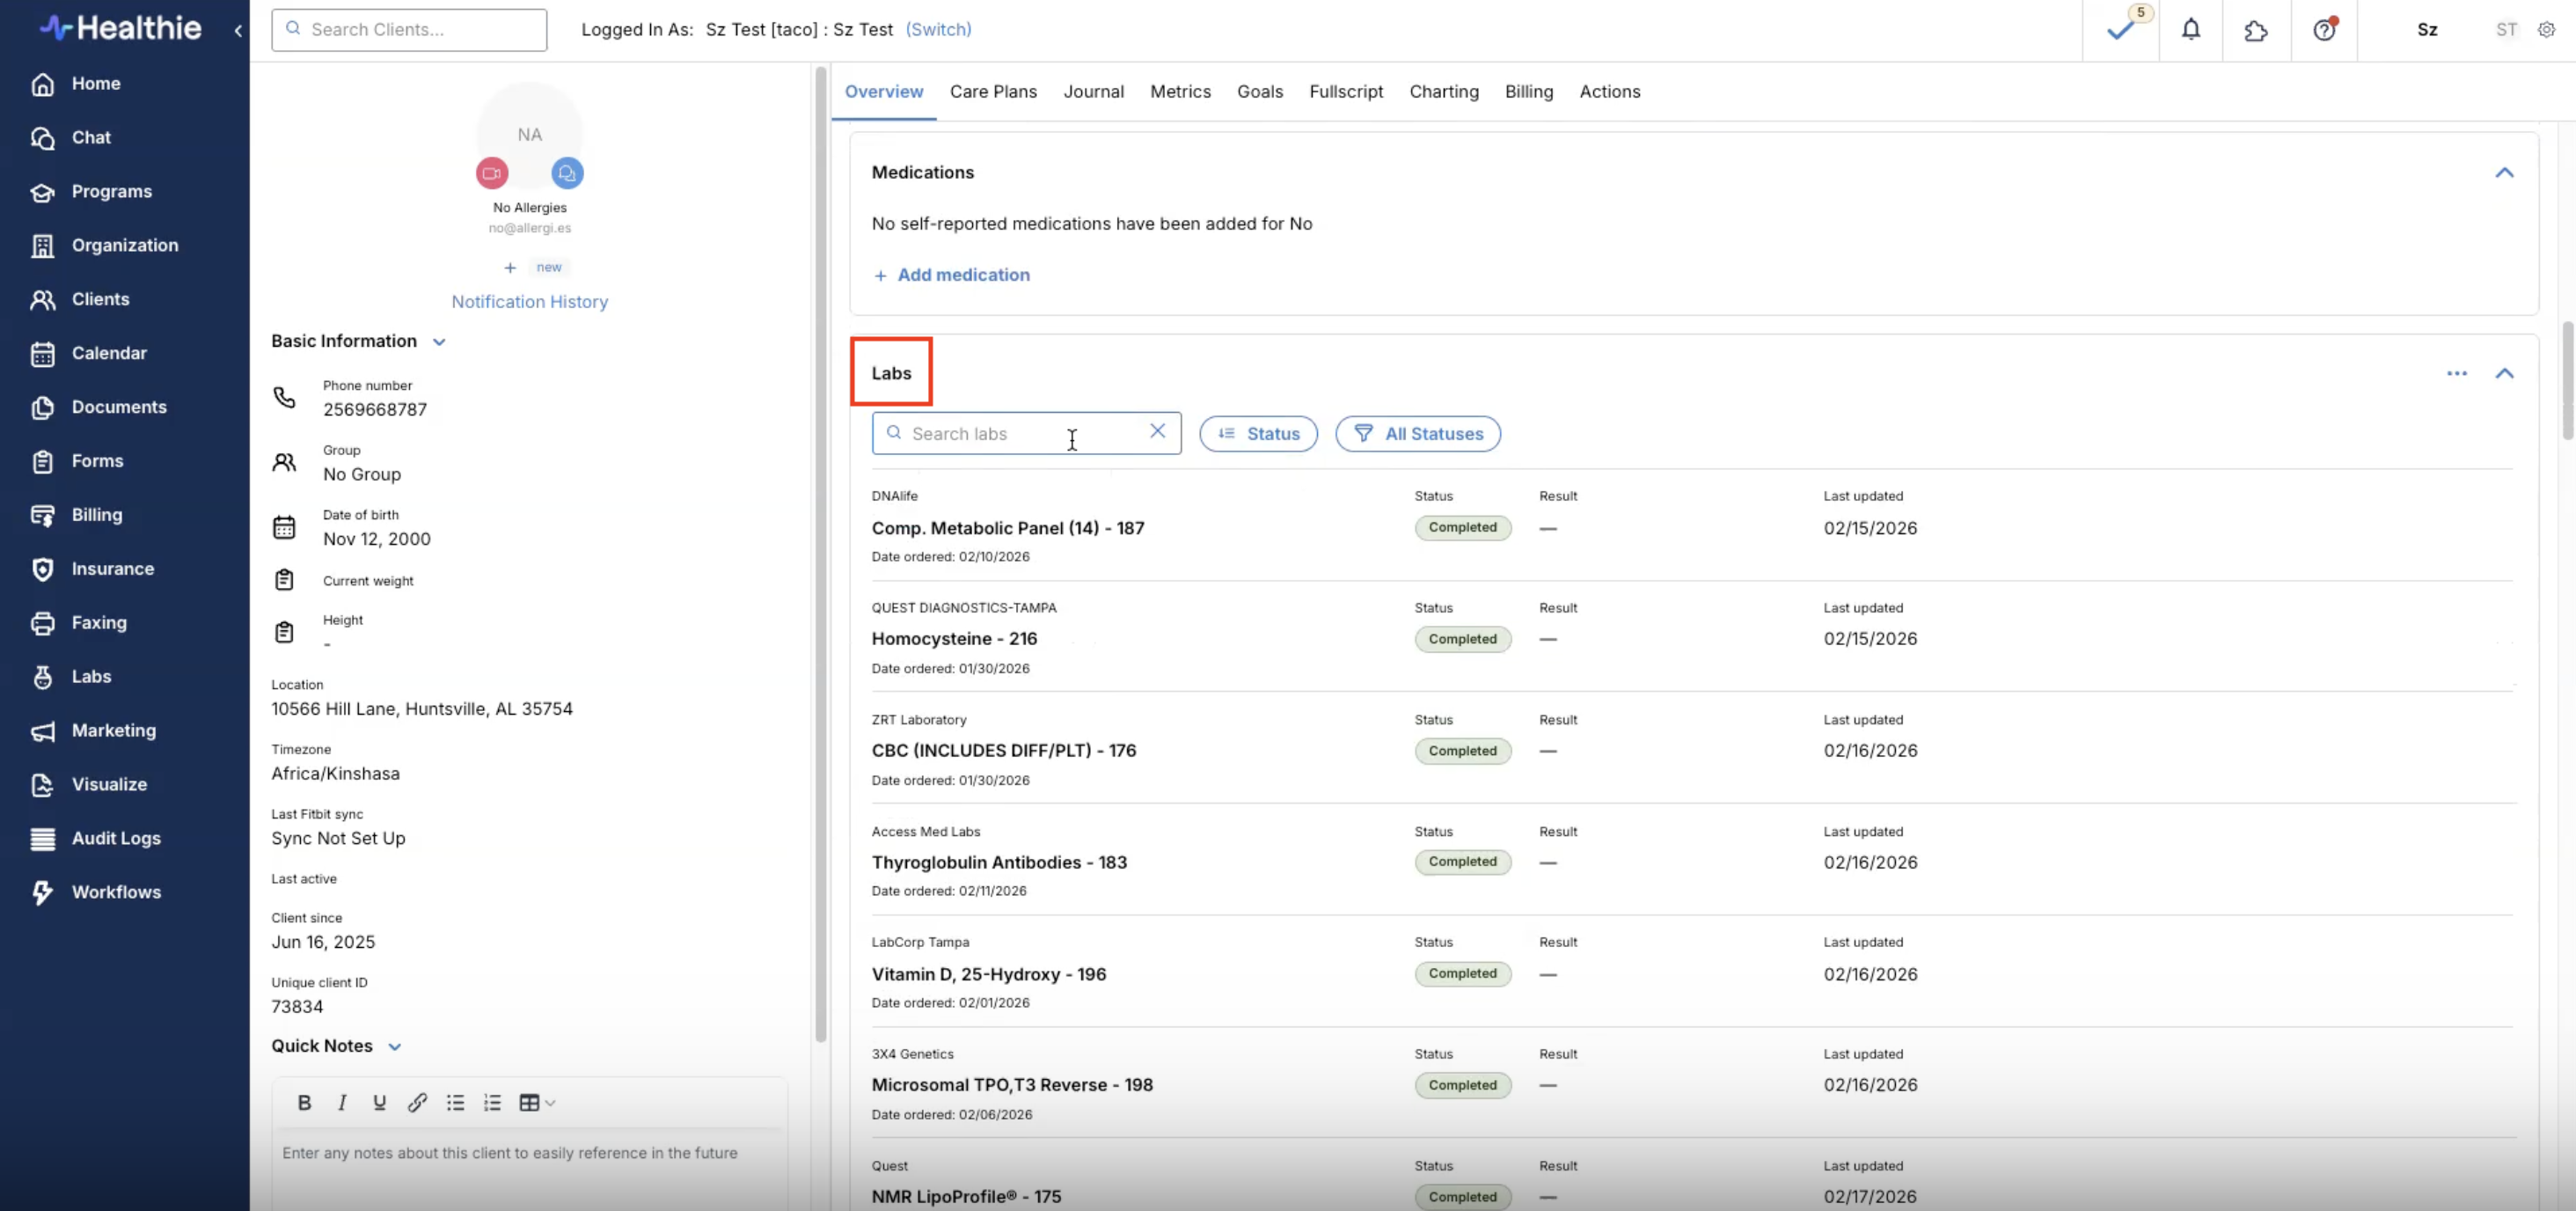
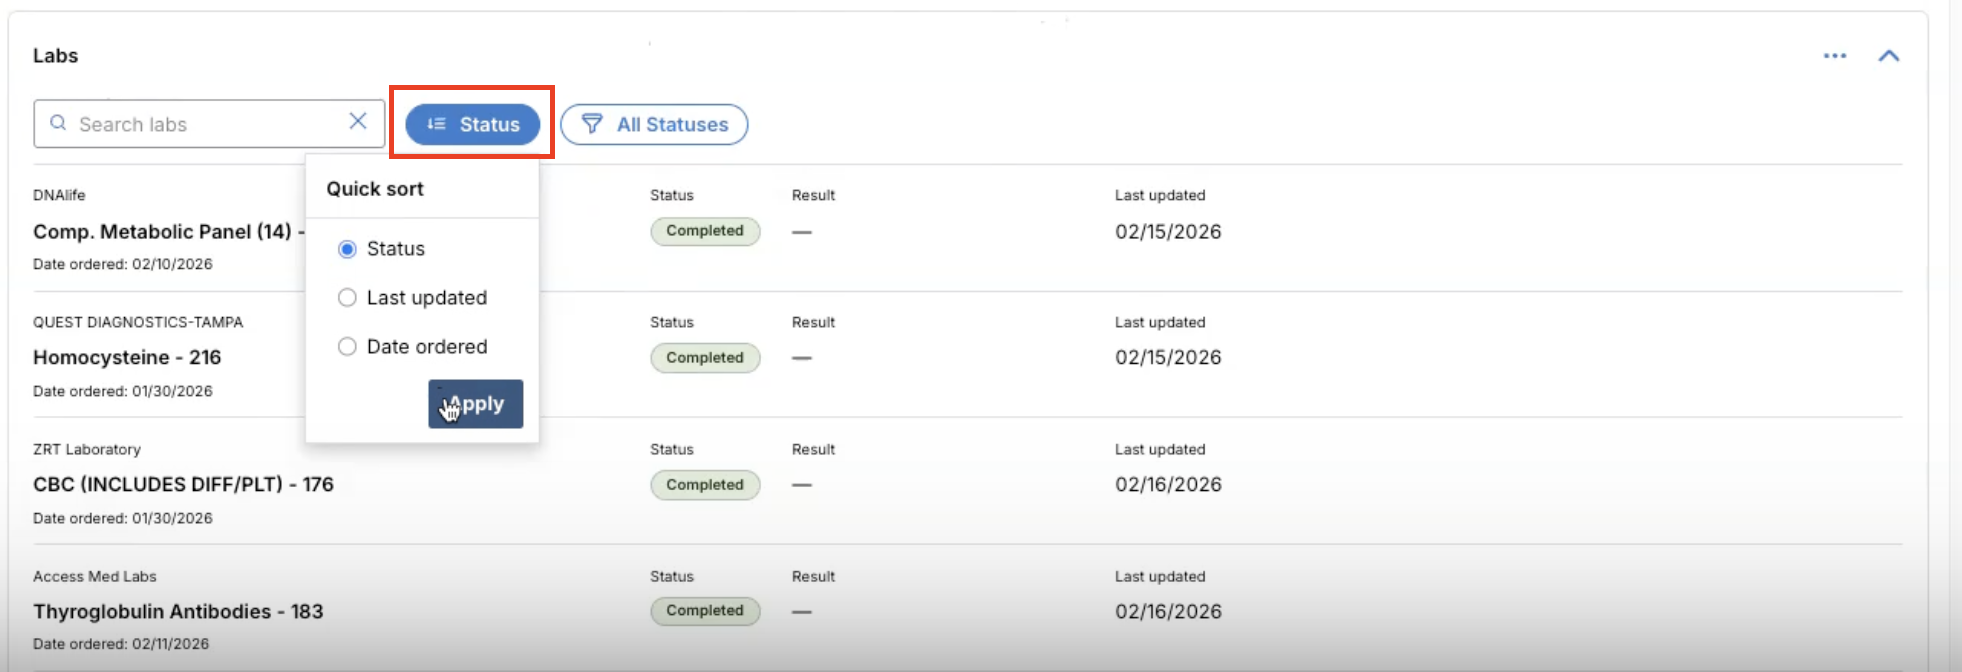
Labs Component of the Client Profile
Within the Clients Profile > Overview you'll find a Labs widget. From this widget, you have the option to search or filter by lab status (Completed, Pending or Error) or sort results by Status, Last Updated or Date Ordered.
Important Notes:
- The Client Profile Labs widget will display lab tests from E-Labs Direct, Change, Fullscript and Rupa.
- Rupa Health has joined Fullscript. Rupa accounts will be moving to labs on Fullscript throughout 2026.

If there is further detail to review for a lab results, click the [...] for that lab > View results page, View results PDF, or View documents page.
- View results page will bring you to the Labs tab in the left-hand navigation. This option only appears when lab results are available as structured data (not for PDF-only results)
- View results PDF will download and open a PDF file
- View documents page will take you to the client's Document library where you can locate the results as a PDF

Medications Component of the Client Profile
You can add a Medications component to the Client Overview page in Healthie. This component displays all of a client's medications—including both e-prescriptions and self-reported medications—in a single view. This helps reduce confusion, improves medication visibility across care teams, and makes it easier to understand a client's full medication history.
What's Included
The Medications component provides a unified view where e-prescriptions and self-reported medications appear together. Previously, these appeared in separate sections.
With this component, you'll be able to:
- See all medications in one place on the Client Profile
- Quickly view medication source and status
- Apply filters and search for specific medications
- Ensure that all team members (not just prescribing providers) can view this information
To add the Medications component:
- Go to Settings > Client Profile > Client Overview
- Check the box for Medications
- Drag the section to where you'd like it to appear
- Click Save

Once added, the component will appear for all users in your organization on every client's profile.
Medication Source and Status Labels Each medication entry includes:
- A source label indicating how it was added:
- E-prescribed (via DoseSpot)
- Self-reported (manually entered)
- A status label, showing where the medication stands:
- Active – Currently prescribed
- Inactive – No longer in use (either marked inactive or end date has passed)
- Reordered – Older version of a renewed med
- Pending – Order placed, not processed
- Error – Issue requires review
- Future Start – Prescribed but begins on a future date
Filter and Search Medications
Available filters:
- Status (e.g., Active, Inactive, Future Start, Pending, Error)
- Source (E-prescribed or Self-reported)
- Medication name
- Effective date

Edit Medications from the Component Some medications can be edited directly from this component—without ever leaving the page.
- Self-reported medications can be edited or deleted by users with the appropriate permissions
- E-prescribed medications (via DoseSpot) are view-only unless you're a provider with DoseSpot access
If editing is available:
- The medication will open in an aside panel, so you can make changes without navigating away from the Client Profile
- You can update the status (Active or Inactive), directions, dates, or comments
- DoseSpot-synced medications will have certain fields locked, with a note explaining why
Collapse Client Profile Components
All Client Profile components are easily collapsible to allow team members to hide sections they don’t need in the moment and more easily navigate long client profiles.
- Each user can collapse or expand sections individually
- Collapsed sections stay that way until manually toggled
Client Profile on the Healthie Mobile App
Healthie's mobile app is available on both iOS and Android with the app name "Healthie." The app serves as a companion tool for both providers and clients for on-the-go communication, food logging, appointment scheduling, and more.
From the mobile app > Clients > Select your client to access their Client Profile. From here, you can quickly view and manage:
- Journal entries
- Chat messages
- Documents
- Goals
- Metrics
- Quick Notes

If you tap further into the Client Name section, you'll unlock the ability to adjust core demographic information for the client.

- First Name
- Legal Name
- Last Name
- Date of Birth
- Phone Number
- Address
- User ID - this ID # is helpful when communicating with Healthie support, and you want to reference a client (without sharing their name or other PHI)
You can also leverage client tags within the mobile app to:
- Add tags to categorize clients.
- Create custom tags to fit your workflow.
- Easily remove or update tags.
Below the client DOB tap the + Add Tag symbol, or directly tap a specific tag to make modifications.

Additionally, you can save time with a dedicated section to view and add quick notes on a client instantly.

Customize the Client Profile
Every organization has its own workflow and needs for at-a-glance information and to support that Healthie allows Organization Owners to customize which components appear — and in what order — on this page.
Note: Only Organization Owners can configure these settings. Changes will apply to all users in the organization.
Customizing the Client Overview lets you tailor the layout of the profile to fit your team’s workflow.
To update your layout as Org Owner:
- Navigate to Settings > Client Profile > Client Overview
- Use the checkboxes to add or remove components from the profile
- Drag and drop to reorder the sections
Click Save to apply the layout changes across your organization
Once the new Client Profile configuration is saved:
- The new layout will be reflected immediately for all team members
- Everyone on your team will see the same set of components, in the same order
- Users can still perform key actions (e.g., Add Diagnosis) from each visible section
No client data is deleted—hidden components are simply removed from view
Components You Can Customize
You can choose to include, remove, or reorder any of the following sections:
- Appointments
- Packages
- Financials
- Credits
- Labs
- Medications
- Insurance Eligibility
- Patient Reported Medications
- E-Prescriptions
- Meal Plan
- Outside Records
- Programs
- Personal Information
- Appointment Pricing
- Insurance
- Client Address
- Diagnoses
- Referring Providers
- Family History
- Family and Contacts
- Allergies & Sensitivities
- Implantable Devices
This flexibility allows you to highlight the most important details for your team—and reduce visual clutter by removing unused sections.