Form Builder: Creating Forms in Healthie
Within Healthie, you can create three categories of forms: Intake Forms, Charting Templates, and Program Forms. Every type of form can be built within the form builder, using the variety of question banks available within Healthie:
- Intake Forms are specific forms that new clients complete as part of their onboarding process. These forms can be added to an Intake Flow to automatically distribute to new clients (or manually request form completion). You can create different client groups and intake flows to have differing onboarding processes (ie. an intake flow/paperwork for adult clients and a second flow/paperwork for pediatric clients).
- Charting Templates are forms that providers use to electronically take notes on clients. You can create custom charting templates or modify existing templates within Healthie.
- Program Forms are a way to collect a regular, ongoing survey from clients. These forms may not be needed during the time of an initial assessment and can be automated to send on a regular cadence (e.g., weekly).
IN THIS ARTICLE:
Create a New Form
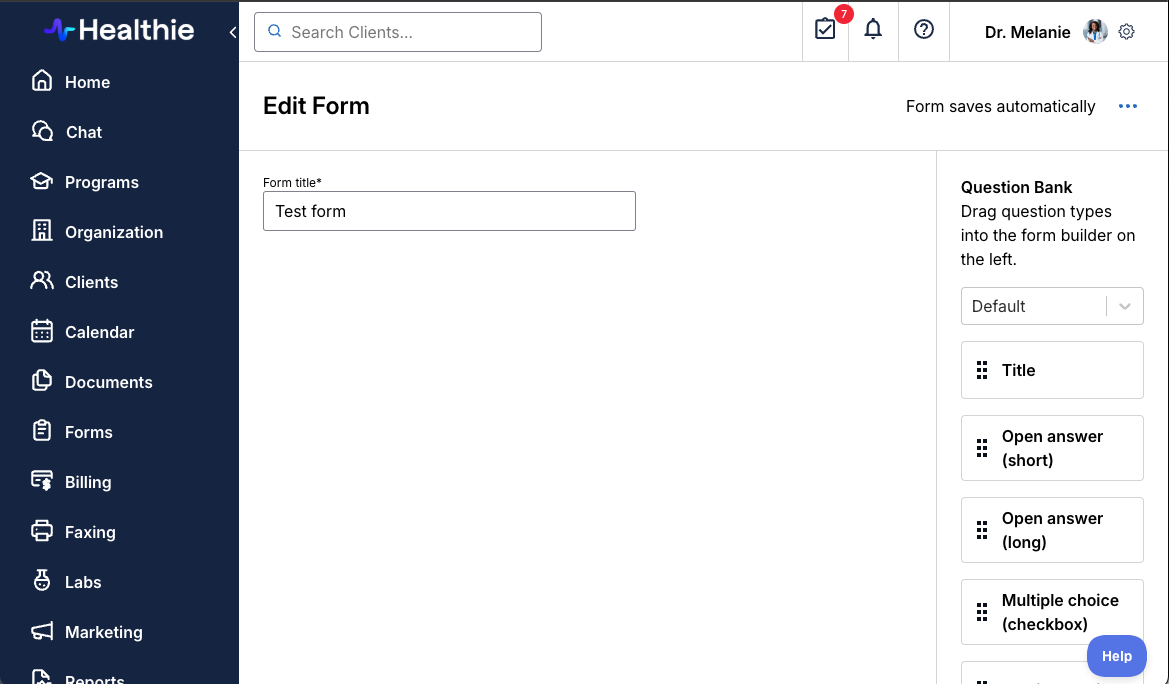
To create a new form:
- From Healthie's Dashboard, Navigate to Forms > Create new form
- Give your form a name. The title is editable directly at the top and saves automatically.
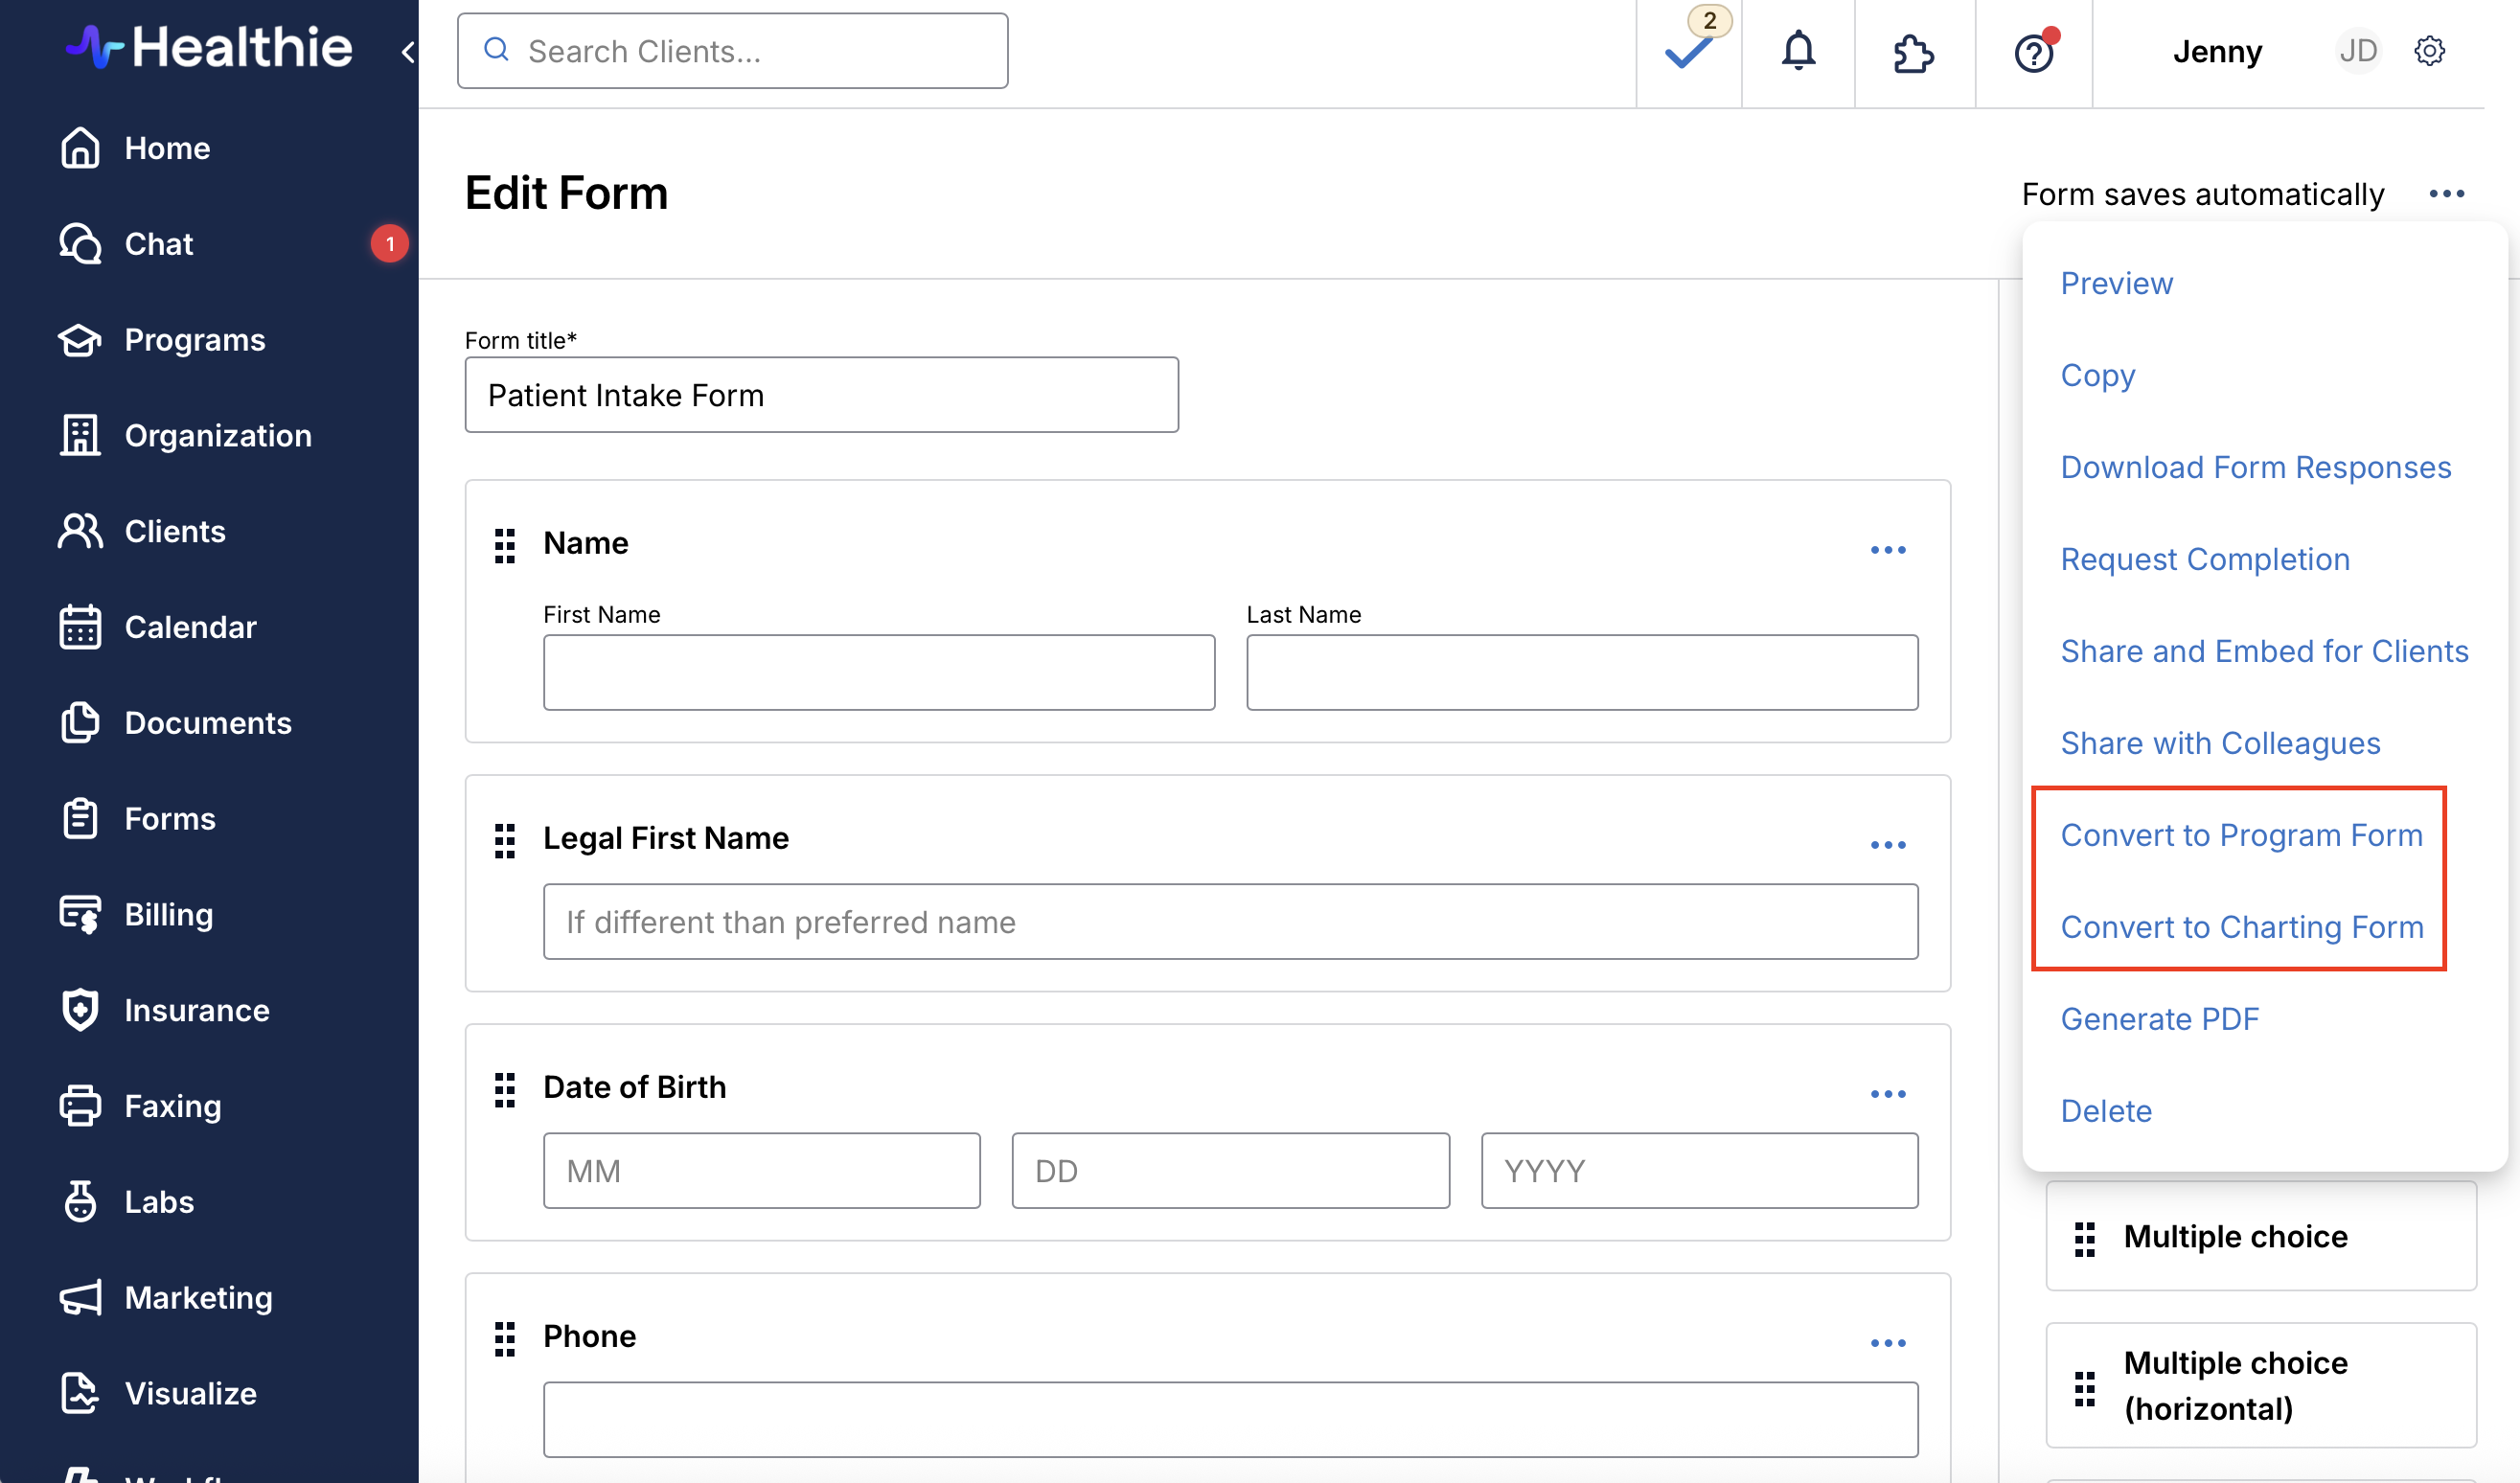
- A new form defaults to an Intake Form. To create a Charting or Program Form, click on the [...] icon in the top right corner and select Convert to Program Form or Convert to Charting Form.
- Use the Question Bank on the right side to search for or select desired question types, then drag and drop them into your form.
- To edit a question, click the Edit icon. The edit panel will open in a side sheet, allowing you to modify the field label, add options, mark it as required, and more.
- Rearrange questions by dragging them to your preferred order. Improved hover and drop indicators will assist you in placing questions accurately.
You will notice that every question is in a box, with an edit, copy, and delete option.
You can continue to drag, and edit fields. Rearrange the field order by dragging a field into a new position on the form.
Updated Form Builder Page
Question Bank Categories
You can search for specific questions using the search bar at the top of the Question Bank panel. Enter at least 3 characters to search across all available categories (including Charting, Client Info, and Copied fields).
To browse manually, there are several categories of "Questions" that you can select from the question bank. By default, the Form Builder displays a “default” Question Bank, which contains general or blank question fields. This allows you to create long/short answer questions, multiple-choice questions, drop-downs, or a matrix.
You can change the Question Bank category by clicking the drop-down and selecting another category such as:
- Default: standard question fields (short answer, long answer, multiple choice, matrix (aka grid/table), add image)
- Charting: common charting questions, ideal when building a charting template
- Client Info: The Client Info bank of Smart Fields allows you to quickly build a form that will collect standard client information including their name, address, gender, date of birth, phone number, and CPT and diagnosis codes.
- Much of this information will be stored in your client's profile. For this reason, we do not recommend that you EDIT these questions (ie. change the name of the field). For any question that will auto-populate your client's profile, you will receive a warning message if you edit.
- Agreement: You can use the Agreement options to add verbiage to your forms. For example, the "Agreement: Read-Only" box is the best way to add verbiage, such as office policies, to an intake form. This way, clients can read through the information without having to fill out any information or check any boxes.
- HIPAA: add a HIPAA policy notice to any form. The default HIPAA agreement form in Healthie is a static, read-only block of text and cannot be edited. If you wish to customize your HIPAA agreement, draft your own copy and utilize the 'Agreement (read only)' form field to host your custom version.
- Video: Add a link to a Youtube, Loom, or Vimeo recording
- Copied: quickly reuse custom questions from your other forms

Mark a Field as Required
To set a question as required:
- Click the [...] icon for the desired question and select Edit to open the side sheet edit panel.
- Check the Make required box.
- Save your changes.
If you set a question as required, a client or provider will not be able to progress within the form unless the field has been completed; a prompt will appear helping them jump to a missing required field on your intake form.
You can additionally make an entire intake form required as part of your Intake Flow.
Note: the Title field and other display-only fields cannot be marked as required.
Exclude Field from Scribe
You can choose to exclude specific fields from being processed or overwritten by AI Scribe when building charting templates. Users must have the Can autogenerate charting notes by AI Scribe organization permission enabled in order to edit the 'Exclude field from Scribe' setting on form templates.
To exclude a question from AI Scribe:
- Click the [...] icon for the desired question and select Edit to open the side sheet edit panel.
- Check the Exclude Field from Scribe box.
- Save your changes.
Note: The 'Exclude field from Scribe' option is not available for the following field types: iframe, image, read_only, document, folder, label, and video (excluding vimeo).
Custom Questions for Forms (including more inclusive gender and demographic information)
To help providers appropriately document a client's gender, and gender identity, there is an option within the Client Profile > Actions > Client Info > Personal Information.
- The Gender field includes an "Other" option. When selected, an additional "Gender Identity" field will appear, allowing you to free text your client's self-identified gender within this field.
- A separate Sex field is available to reflect the sex designation listed with the client's insurance provider. This field will pull into the Sex on file with client's insurance section in the client's profile and supports accurate billing, as well as CMS 1500 form creation.
These same fields - Gender, Gender Identity, and Sex on File with Client's Insurance - can also be added to Intake and Charting forms using Smart Fields within the Form Builder. Responses entered in these form fields will automatically sync with the client's profile, helping to ensure consistent and accurate records across your workflow.
For further flexibility, you can use blank or default question types (e.g., multiple choice or dropdown) in Form Builder to create your own customized fields. This allows you to tailor demographic questions based on the needs and language preferences of your client population.
At Healthie, we understand that diversity, inclusivity and sensitivity are critical factors in healthcare screening and care. For this reason, we continue to add items to our Product Roadmap that will help make default intake forms, and client-facing aspects of the Healthie portal, increasingly more inclusive. If you have any specific suggestions or requests, you can share them with our team at hello@gethealthie.com.
Advanced Form Configurations
Healthie's Form Builder can be leveraged to create the most intricate, and custom forms, needed for your business. Here are some advanced configurations you may want to apply to your form(s).
- Add a Document or PDF to an Intake Form (as viewable, not fillable)
- Add a Logo or Image to a Form
- Add an e-Signature to a Form
- Smart Fields to Connect Intake Forms and Charting Templates
- Using Matrix Fields in Form Builder
- Anatomical Charting (have a client indicated pain relevant to body areas)
- Incorporate Metrics into a Form
- Request clients upload an image while completing a form
- Conditional Questions
- Specialty Charting Forms
Additional Resources
- Quick video: Build an Intake Form, to learn how to use Healthie's drag & drop form builder tool.
- Join our free weekly recurring Live Classes, including a review of intake forms & intake flows. Find a Class.